My Basic Scenery Techniques: Vegetation, Ballast, and Relics of the Old Main Line.

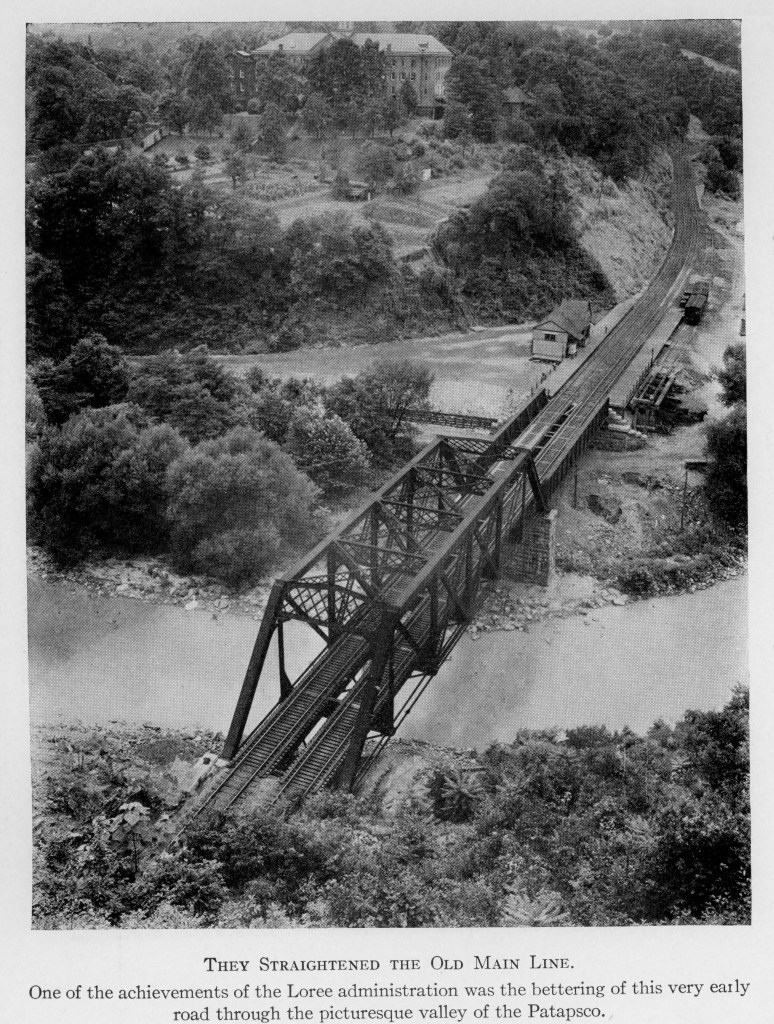
Some parts of the B&O Old Main Line (OML) remain and remind us that this was not always a shortcut to Baltimore from the west. It was built as a permanent structure to move freight from the middle of the country to its ports in its first 50 years of existence.

My layout is set in August of 1950 and I am trying hard to duplicate the look of that era. Cinders abounded and spread out along the right of way and there was an effort to catch up on deferred maintenance from the Second World War, which took its toll on the right of way. And even by 1950 the OML was still recovering.

On my first “TOMA module” of the Old Main Line, scenery shapes were formed with one and two inch insulating foam cut with a handheld drywall saw to create rough shapes. Messy, and I had to keep a shop-vac handy. I covered them with a Scluptomold mix, now often described as “Scenery Goop”. Not that I have anything to do with its current widespread use, but I have been using this since I was 12 years old. The owner of my local hobby shop recommended it for model armor dioramas and I thought it would be useful for model railroad scenery. At the time plaster and zip texturing was the conventional wisdom for layout scenery.
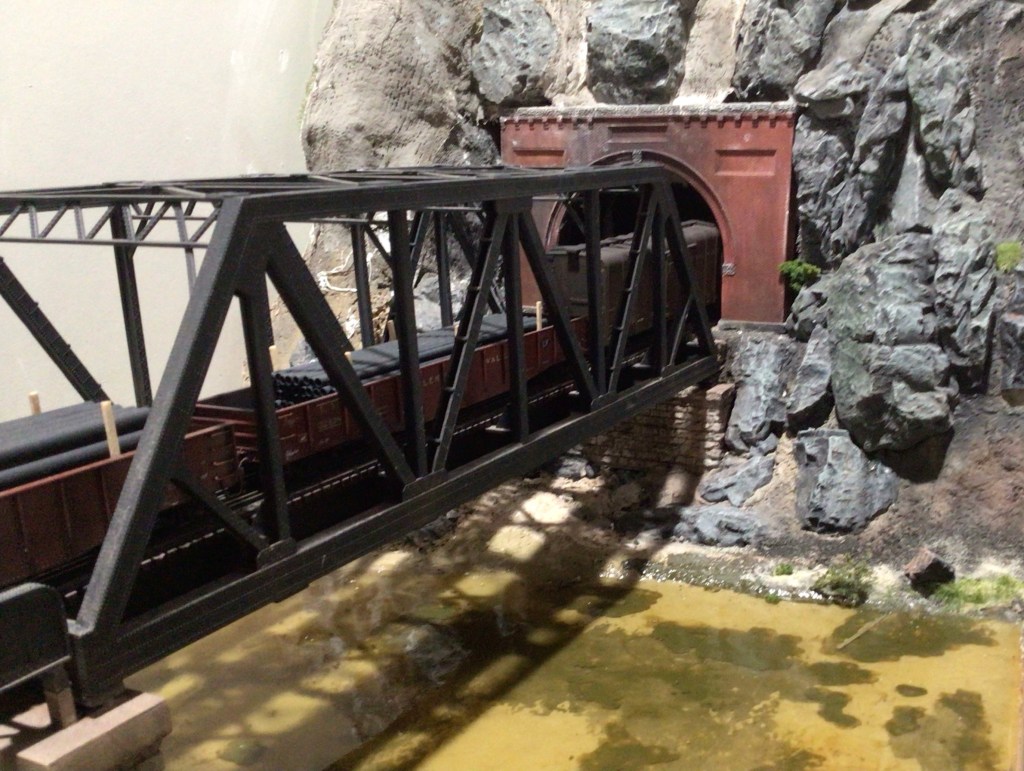
West Tunnel Portal of Ilchester Tunnel. More trees need to be added over the portal to complete the scene.

The tunnel portal on this first module has the classic or cliche train layout look of protruding rocks surrounding a tunnel opening. In this case it is the prototype. The Patapsco River flows east to the Baltimore harbor and hits this granite hill, then turns south, and goes around it leaving exposed rock and barely enough soil to support some trees. The railroad followed the river until early 1900s realignment and a tunnel was bored through the hill. To model this steep cliff face I used a variety of Woodland Scenics molds to cast sharp rock outcroppings to simulate the location. They were covered with black paint for a background, drybushed with light grey for highlight, then lightly over sprayed with a light green to simulate the moss that grows on them in the damp valleys of the US Piedmont. I tried to place them similar to the prototype and filled the area in between with goop, Woodland Scenics clumps, and parts of Scenery Express trees were added to simulate the trees that struggle to exist on rocky outcroppings.

The tunnel portal is a very accurate commercial product by Monroe Products (#151 Tunnel Portal Brick B&O style, Double Track) that replicates the brick tunnel portals the B&O used at multiple locations along the Old Main Line. It is a hydrocal casting that I stained with box store acrylic paints thinned with isopropyl alcohol.

The tunnel portal casting.
Ilchester Road, the Buick is headed north in the photo under the RR bridge. The Station and Freight House are to the left and the tunnel to the right. The bridge and tunnel are still there in 2023. The station and freight house are gone.

Ilchester Road appears to still have been a dusty, dirt road in 1950. I modeled it with light colored grout to match period photos and the unpaved areas that still exist in the area of the bridge. I added a thin layer of grout then treated it like ballast, with a covering of thinned water and white glue. I added tire tracks to the underlaying layer of sculptamold. The trees are actually curved away from the tracks as the cinders and debris would have kept them from growing too much closer to the tracks. They are Scenic Express trees I coated with various shades of medium and light greens to replicate trees that are still growing, near the end of a a hot, humid summer in Maryland. Late July and August have always meant 90 degree plus temps with 80% to 90% humidity and afternoon thunderstorms. Not great for some humans, but another growth season for vegetation. Having spent some winters in Pittsburgh when the B&O transferred my Dad, I alway love July and August for its hot weather.

Vegetation along the right of way is something I get to study almost every day. I live about 15 miles from the B&O’s Old Main Line and much closer to the PRR’s old Northern Central Railway line. They were constructed within a few years of each other, each following a river. One is still an active rail line, the other is a rail trail that starts 600 feet from my house. I try to walk 3 miles every day and I often ride my bicycle on the trail much further. Having worked on and more recently walked portions of the Old Main Line, I can attest that the vegetation is very similar.

Ilchester Station looking east. Circa 1945. Photographer Unknown.

The steep bank to the right in the prototype photo above looks like it is covered with Woodlands Scenics ground foam. I see this everyday on the NCR Trail. It seems like a cop out to not use some new technique for scenery, but ground foam with some variations in size and color, along with some smaller trees actually seems to replicate this right of way well. Like the NCR right of way, the OML has large granite outcroppings. The are dark grey with lighter edges and often tinted green with moss and other organic coverings.

Looking east on the Old Main Line toward Ilchester station on the layout.

Ballast is another topic that is best covered in a brief way. When you’re a trackman on the railroad, ballast is part of the job. You learn how to make sure it is solid and on production gangs with big, mechanical ballast tamping machines. But back in the 80s, you still learned how to use a ballast fork to tamp a tie by hand. One guy on a lining bar to raise the tie and two guys, one on either side of the tie sliding their tamping forks under the sides of the tie to add ballast underneath until it was solid.

HO scale ballast is more decoration than function. One tries to replicate the amount of ballast present on different tracks to show usage or importance. Today, mainlines are often maintained by large machines to tamp and level track. In previous times this was often done by section gangs that were responsible for a certain distance of track. I got to work on a section gang a few times on the OML. Even in the 80s there was a lot of pride taken on the look of the mainline. I never saw anyone leave a stone on top of tie, it was cultural no-no. Something you just don’t do!!

The ballast I remember on the OML from the 80s looks like the ballast today and how it looked in color photos from the 1950s. It was white to very light grey limestone rocks, about 2 inches in diameter, very roughly. The rocks weren’t as big as my foot, nor were they as small as my finger nail. They were more like a rock that could fit in your hand with a closed fist. Older 1950s era photos show a similar maybe slightly smaller stone, but the color is seems consistent.

Another unique part of the OML are the old walls, stone ties, stringers, and bridge abutments found along the right of way, many not in use. In this modern photo (below) of the tracks between Ilchester and Ellicott City there is a retaining wall still doings it’s job, probably 100 to 175 years after it was built. I chose to add this to my layout to offer some respect to the men who built this line to Ellicott City back in the 1830’s. I used a Chooch product, 215-8250 to replicate the wall. It still needs some weathering to fit the scene and there is obviously a need for cinders and some vegetation.

Winter Photograph, March 11, 2018. Bruce D. Griffin photograph.
The unfinished scene on the layout, 2023
A flexible stone wall product.

I wanted to add more detail and photographs to this post, but that just means waiting longer to post something new. I will follow with photos of completed scenes. Thanks for taking a look.
Enter your email address to subscribe to this blog and receive notifications of new posts by email.

BLI USRA Light Mikado to Replicate B&O USRA Light “Mike” Class Q-3 #4522 – Part One – Replacing the Model’s Drive, DCC, and Sound.

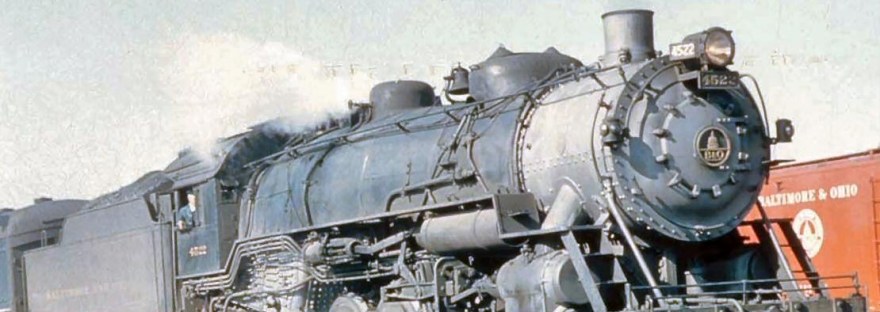
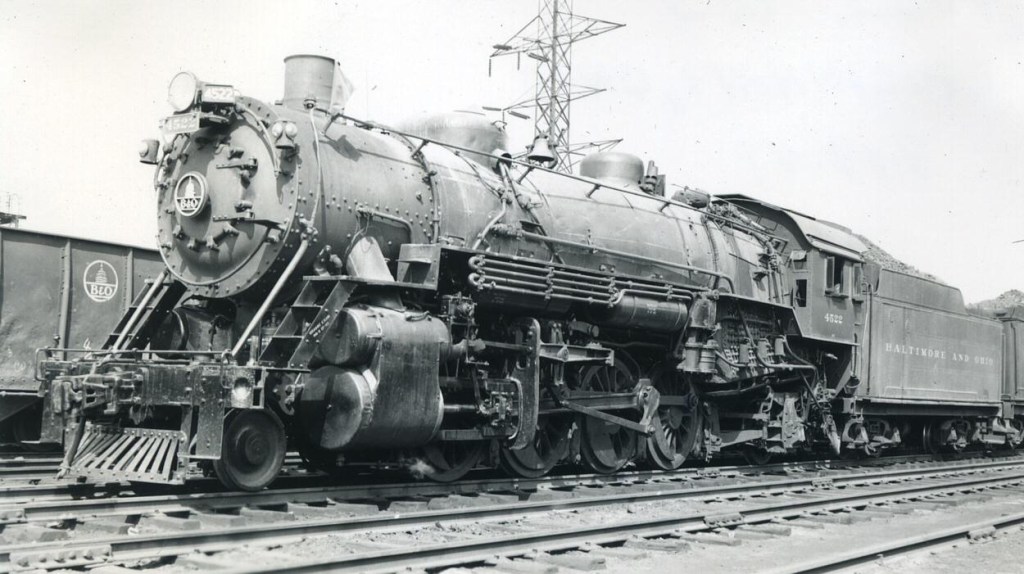
B&O Class Q-3 #4522, 1956, Baltimore. North East Rails Collection, Baltimore & Ohio (B & O) Steam Roster (the location on the website caption is believed to be incorrect and the location was Cincinnati, OH) http://www.northeast.railfan.net/images/bo4522s.jpg

With this post I am going to try something new. Sharing a blog post about an incomplete individual model. It’s something I don’t usually do because I was used to writing and editing for the B&O Modeler. Most articles were stand alone and if we ran a two part, it was usually because of space limitations, not that the model wasn’t finished. I like the style of successful and very informative modeling blogs like Rick De Candido’s and Eric Hansmann’s, as they share smaller bite sized posts. They keep my interest in modeling high, especially during the summer with so many more leisure activities available.

One of my first sound equipped HO locomotives in the early 2000’s was a Broadway Limited Imports (BLI) USRA Light Mikado. It would run under the Christmas tree on my small, circular HO layout for hours under DC power. I later added a BLI “black box” that connected to the layout wiring to let me control the basic sounds. I was hooked on sound and knew DCC with sound, though expensive at the time, was in my future.

The B&O had the first USRA Light Mikado, #4500, and it still exists at the B&O Railroad Museum in Baltimore. It was unique from later builds in a few ways including the cab shape and cab size. The BLI model is a more generic USRA “common build” model. The B&O changed many things on their USRA Light Mikados (Mikes in B&O parlance) over the years and classed these locomotives, Class Q-3. The most visible changes to their USRA Mikes included; adding an extended cab on the fireman’s side to accommodate a seat for the headend brakeman (this was done on many B&O Mikes), a twelve bolt smokebox front, a high mounted headlight, number plate or B&O Capitol Dome in the smokebox center, and the bell moved from the smokebox to behind the sand dome. There are more and I will add them to the conversation as I add detail parts to the model.

All B&O Mikados or Mikes were in the Q-series of locomotives. A great source of information on this B&O series of locomotives is Q The Definitive History of the Baltimore and Ohio Railroad Company’s Q-Class Mikado Locomotives by by Howard N. Barr (Author), William A. Barringer (Author), Harry C. Eck (Contributor), Charles S. Roberts (Contributor). It offers multiple pages on each class with information about when they arrived new and how they changed over the years while in company service. It was published in 1978 and is long out of print, but often available on Amazon and other used book seller sites. I saw five available from $30 today.

My 1950 Old Main Line (OML) layout needed a Mike for the local or peddler freight. Most of the time a Q-7f was assigned to this duty. Modeling this engine is difficult as it has only been produced as a brass HO model by Precision Scale a number of years ago. They now sell for well over $700. I have one now that I am modifying to look like #4844, which was photographed leading the peddler in my era. B&O Q-4 Mike locomotives were photographed in my era as replacements for #4844 and it seems reasonable that a B&O Q-3 Mikado may have also been assigned to this service when needed. My trusty old Broadway Limited Imports (BLI) USRA Light Mikado was one of the first Mikes to pull the peddler freight on my layout version the OML and has served well. This locomotive has been the main test engine for my layout, if it could make it through a turnout or curve, I hoped everything else could also. Most of my steam for my Old Main Line layout will be Mikes, mostly brass Q-4 and Q-7f models as that what was present in 1950. Through freights will also sometimes be handled by early diesels.

With this BLI model getting older, the drivers slipped out of the track a lot due to sideplay, so it was a good test for bad track work. And I ran it many times through new turnouts, curves, and testing operations, in fact, after it recently derailed through a new crossover, I took it to the work bench to look underneath. The plating has worn off a driver or two, the springs appear to have disintegrated, and the bearings are loose enough to allow a lot of sideplay on the main driver. Fortunately, these models are available on the secondary market and for less than $200 I was able to replace the entire drivetrain. The stock decoder had some glitches and my JMRI programming track couldn’t overcome them after repeated resets. So, while I was at it, I took the opportunity to replace the stock DCC and sound equipment with a Soundtraxx Tsunami2 TSU-2200 Steam 2, a Soundtraxx 810140 CurrentKeeper, and upgrade the speaker to a Scale Sound System (SSS) Force Full Range speaker. I chose the SSS 12mmx25mmx25mm, FFST -1225-RC1 to get the biggest speaker box possible into the tender.

The tender body is a press fit, making it easy to remove and put it back in place to make sure the parts fit. The blue and yellow wires will power the tender’s rear light when connected to an LED.

I was apprehensive about touching the DCC and sound in this model as while it is not the greatest DCC sound decoder available today, it never failed to at least run in over 20 years of service. But all that running took its toll on the model and probably the electronics, so maybe it was time for an upgrade. The drivetrain seems to be relatively universal to any similarly aged version of this BLI model, so I sought one on the second hand market, hoping to just switch the drivetrain on my B&O detailed boiler shell and possibly using the same tender.

The second hand locomotive I purchased was about the same vintage and decorated for the Texas and Pacific (T&P). It was advertised as having DCC/Sound, but when it arrived, the tender only had a set up for DC, no decoder or speakers. The seller refunded me some funds to purchase speakers and I figured I was eventually going to update the decoder, so no time like the present.

I always knew I would update the DCC/Sound unit someday, along with other detail upgrades. This was a future project that became a “now” project as I wanted to have a simple, reliable locomotive to test my growing layout. And when you start taking things apart, it is hard not to upgrade them to your vision of “good enough”. But I will share the detail upgrades in future Part Two post.

I was able to reuse the wiring harness and traced every wire back to its origin in the boiler and made the connections in the tender electronics through the original wiring harness. I did add a short piece of black shrink tube first to make the tender to locomotive connection look like a black pipe, possibly representing the stoker. The key to the easy installation was having the right parts. They all fit easily onto the tender base. I made a raised platform from styrene about 3/8” high on the rear of the tender base behind the speaker to mount the decoder and capacitor to avoid fouling the original connections to the trucks. The main purpose is to allow easier access for future maintenance. I’m sure I’ll have to replace or adjust something in the future if I keep running the engine, which is the goal!

One of the big obstacles to recreating a later era B&O Q-3 is the addition of front end brakeman’s seat on the fireman’s side of the cab. I want to mention that I hope to be working with a fellow modeler to create a printed cab to fit the BLI USRA MIke. The original cab is a friction fit and I was able to replace mine with a resin part that has not been available for many years. Hopefully a new part will be available soon if you are thinking about a BLI USRA B&O Mike for your collection. Let me know if you have interest and I will pass that along.

I will end this post with a short video of the Mike in its half finished state, but with its sound system complete. I believe the SSS speaker and Soundtraxx sound decoder make a big difference that is audible in this iPhone SE video. I hope you agree!

The less than detailed BLI USRA MIke with its new Soundtraxx Decoder and Scale Sounds Systems basic speaker.

Enter your email address to subscribe to this blog and receive notifications of new posts by email.

Ilchester, Maryland, Part Five; The Railroad Infrastructure. The Freight House.

The Freight House

This part of the Ilchester railroad infrastructure seems to be fairly short-lived, it was around in my era of 1950, and very camera shy. It appears in parts in only a few photos I can find after years of searching. It is the raised Freight House on the left side of the photo, railroad east of the station. The B&O always ran east to west and always had a north side and south side of the tracks, regardless of what a compass indicated. On the B&O, Washington, DC was not south of Baltimore, but west.

August, 1952 photo of Ilchester Station and Freight House, B&ORRHS Photo Collection.

This might be the best picture that exists and it appears to be from August 1952 according to one caption. The board and batten siding and peaked roof are not things found on many eastern B&O structures.

My guess is that this station, its freight house, and coal trestle were originally built to serve the local community. Baltimore had some of the earliest “suburbs” in the nation. Areas like Roland Park were built in the 1890s and even had one of the first shopping centers. It was served by street cars and I suspect it served as a model for future possibilities. Pure conjecture, but early photos of Ilchester show long wood passenger platforms on both sides of the rail along with the coal trestle that could serve local coal deliveries. I wonder if the B&O thought Ilchester could become the next suburb served by passenger trains into the city? The station and infrastructure were built after the 1903-05 realignment, maybe adding the station was hoped to serve more than the boarding school or convent on the top the hill behind the station. The history of this area is not well documented and the effort of several modelers have served to add to the knowledge base. County historians look to fellow B&O modeler John Teichmoeller for definitive information about this community.

Photograph origin unknown.
Ilchester, MD 1941. Herb Harwood Photograph, B&ORRHS Collection.

How to model this elusive freight structure? Photos show board and batten siding and the building on a raised platform. The overhead view shows a peaked roof structure about 1/4 the length of the station and half its width. Their are standard B&O plans for a 16’x 20′ freight house, so maybe that size is appropriate. I know modelers build on less information and this may be all I ever find, so that’s what I am going with. On the up side, as soon as I complete the structure we all know a new photo will turn up. If so, at least the historical record can be set straight and I’ll have another structure to build.

There is a similar freight house at Dickerson, MD on the Metropolitan Subdivision and I used photos of it to supplement the photos of Illchester I found.

Dickerson Freight House and Station on the Metropolitan Branch. Underwood Photograph, Barriger Collecion.

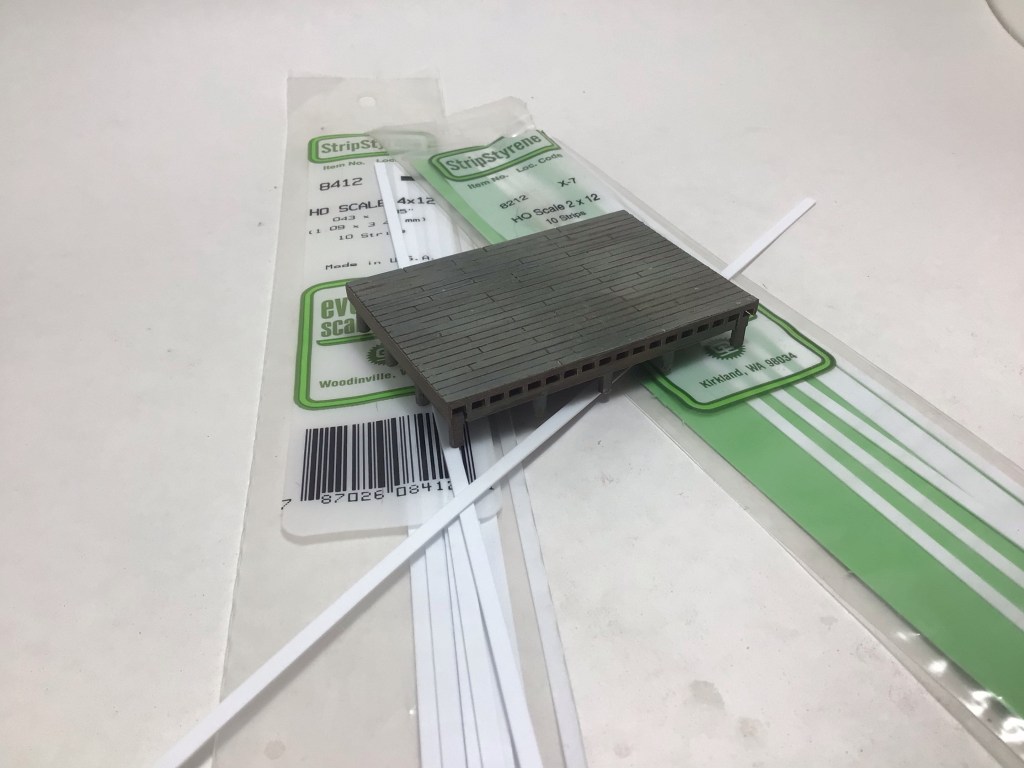
Using the rough dimensions from the overhead photo, I constructed the 15’ x 24’ raised wood platform from an old plastic kit from an unknown manufacturer. It was very close to the construction and dimensions of the platform in the standard B&O plans book available from the B&O Railroad Historical Society. The plastic kit was supplemented with scale Evergreen “lumber” to enclose the lower part of the structure which was painted a dark grey/black brown.

The platform from a very old kit, and Evergreen dimensional “boards” to enclose the platform.

The steps were from an old Campbell kit, but these are easy to replicate with styrene or scale lumber. They were painted the same color as the platform.

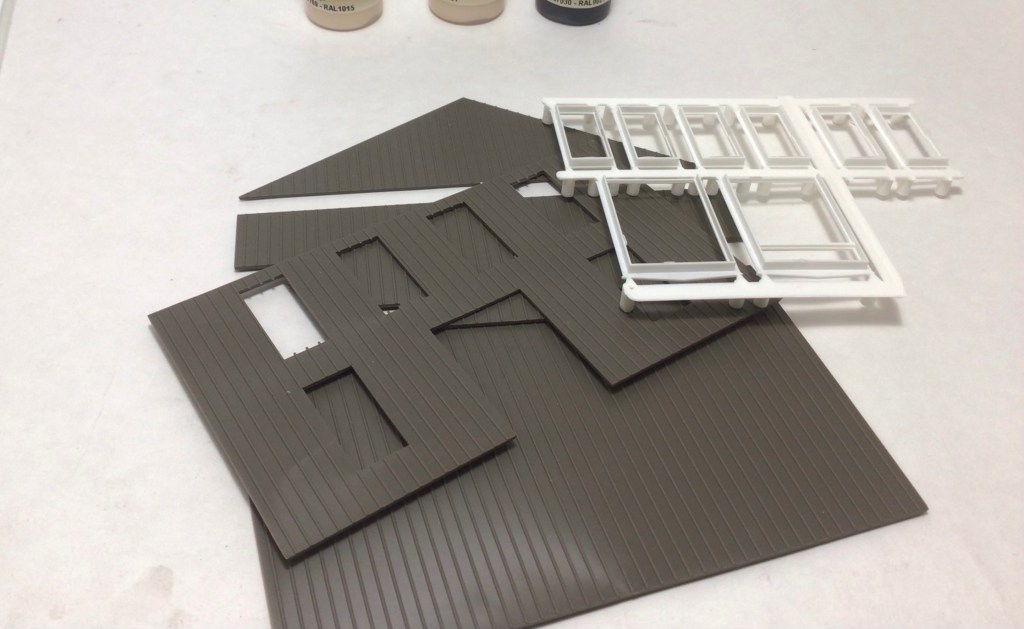
For the structure, I found another very old kit at a train show that had lots of board and batten sided parts along with a bunch of windows and doors for future projects. It took a while, but it’s always good to have something inexpensive to find at a train show or new hobby shop.

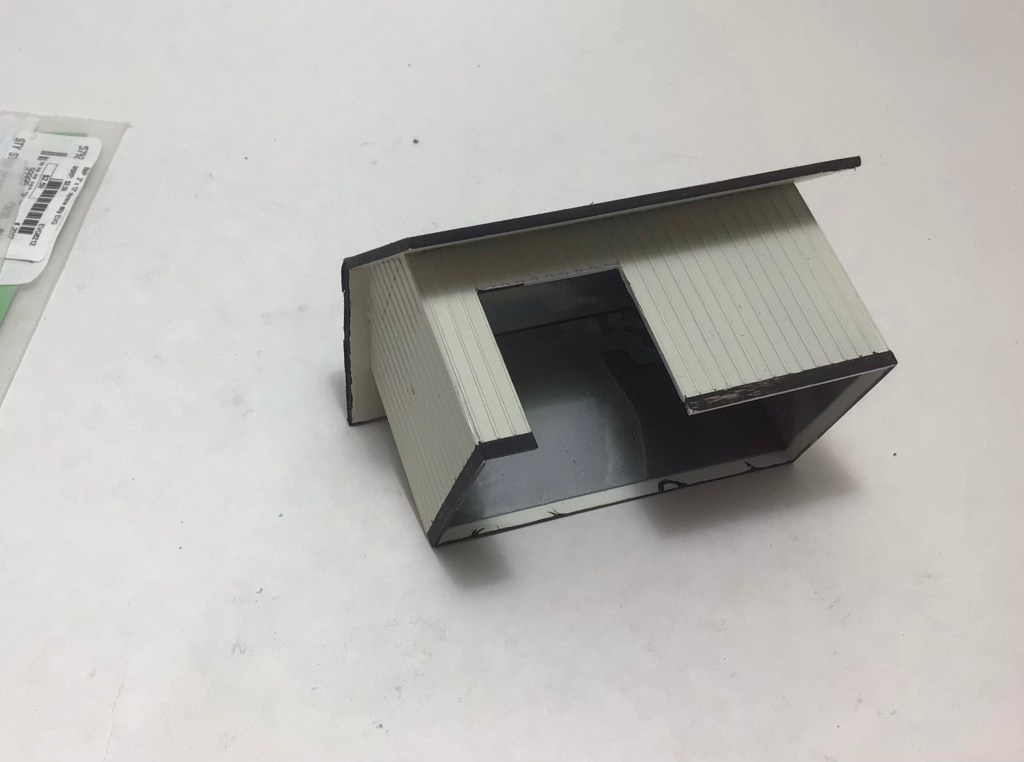
I cut the siding pieces to create 23’ x 12’ structure with a 8’ x 8’ opening for the door. The door is Evergreen styrene scribed siding painted the same black as the trim. The roof is .060 Evergreen styrene and I matched the roof pitch of the station building to mimic the photographs. The base trim boards are Evergreen styrene strips.

The roof is .060 styrene with the edges painted black to represent the trim boards.

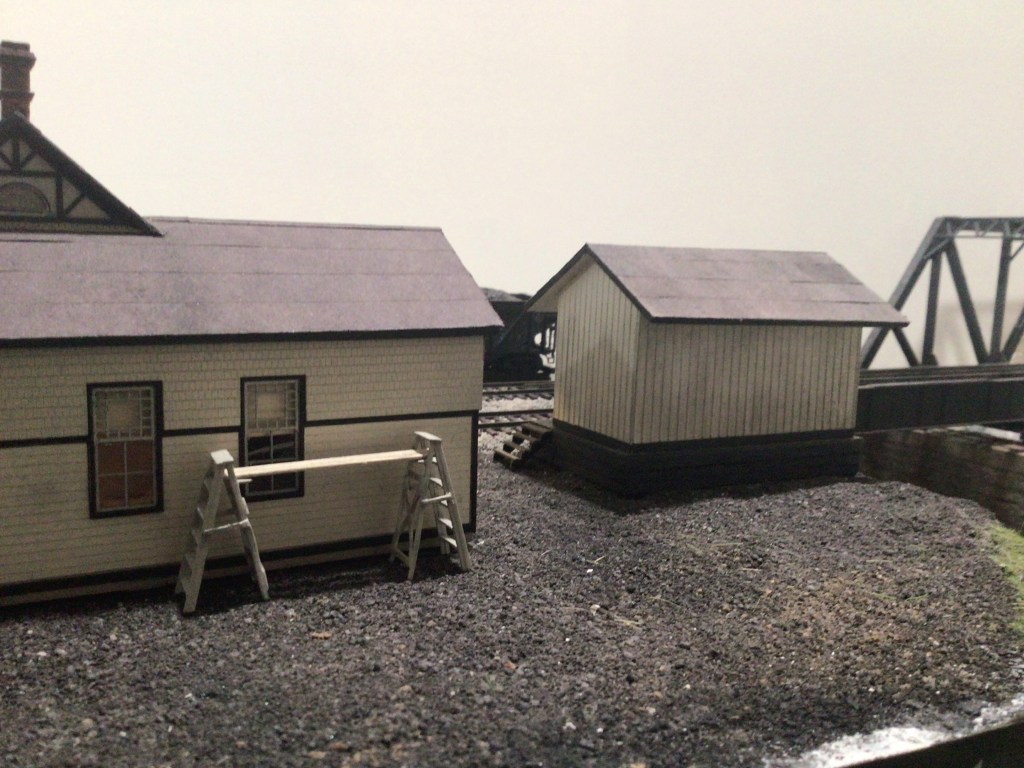
The roof was covered with faded black construction paper to simulate tar paper roofing.

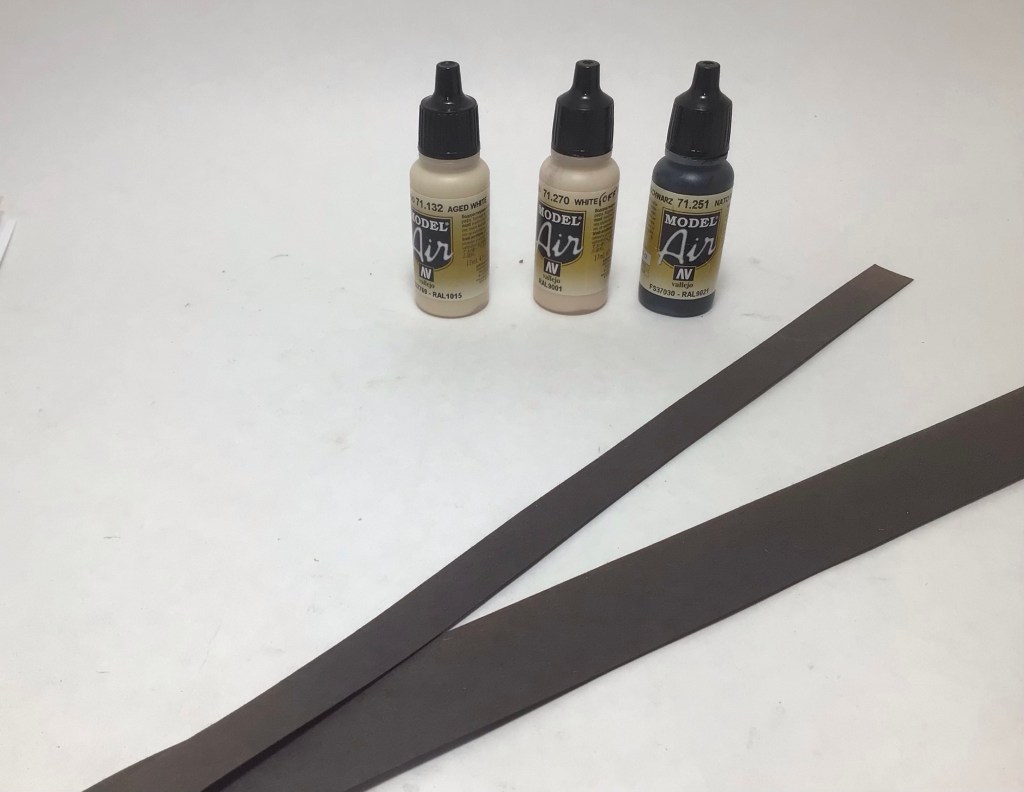
I used the same paint colors as those on the station for my rendition of the Cream and Black colors I remember seeing on old structures painted in this combination. It also matches favorably the Cream color shown on a 1939 paint chip card I received in an email some years ago. To match it, I airbrushed Vallejo Model Air 71.270 White (it is not a pure white) mixed with 10 drops of Vallejo Model Air 71.244 Sand Beige added to the almost full bottle. For the Black trim I used Vallejo Model Air 71.251NATO Black, it is a weathered flat black that has a slight brown hue that matches my recollection of the color.

Looking across the mainline tracks at Ilchester from the north.
The back of Ilchester Station and Freight House looking north from the parking lot.
I added the freight agent as he appeared in the first photo of this post. Detailing the figure was covered in an earlier blog post.

Enter your email address to subscribe to this blog and receive notifications of new posts by email.

B&O M-24 USRA 40′ Boxcar – Achieving a Color Shift on a Rapido Model

B&O M-24a or b “Cement Car”. Paul Dunn Photograph. B&O RR Historical Society Collection.

This is a quick blog post so that others faced with a similar dilemma can see if they can use my techniques to shift the factory applied paint on their Rapido USRA B&O M-24 boxcar. I have several other blog posts and models I am working on, but this was an unexpected issue that came in the mail with my factory ordered model. I expected a brown boxcar to arrive and when time allowed I would change some lettering to reflect a ten year old boxcar on my layout set in 1950.

When the car arrived along with a Midwestern road version that I was really after to serve my milling plant, I took a few minutes at lunch to add some black and gray pin wash to both cars. The finish was glossy enough that I thought the technique could work straight out of the box, no gloss coat required.

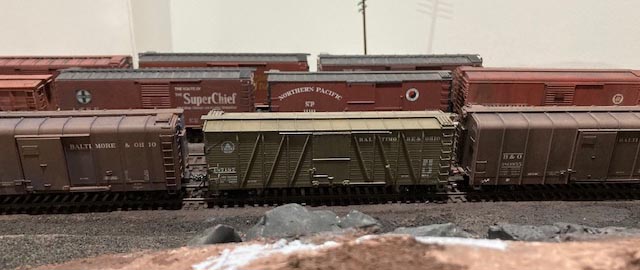
The Rapido model is between two other commercially available B&O freight car brown boxcars that are close to the color seen in prototype photographs from the era. The only alterations to the Rapido car are some black pinwash on the simulated metal parts on the sides and ends. The other cars have been sprayed with a clear matte varnish over black and dark gray pastels. The photo was taken under 5000K LED bulb lighting.
The same model photographed in natural sunlight with the same slight weathering.

The pinwash did work and since I was was working near a large window, I had lots of sunlight to assist. This environment made me look closer at the color of the B&O car and I was convinced it was more green than brown. Sort of an US Olive Drab Green. I took some photos. And then when I got home I put it on the layout next to other boxcars of all kinds and to my surprise it looked even more green. I know lots of people have some type of color blindness so I thought that’s what I was seeing. But it was definitely different and didn’t come close to any of the B&O brown boxcars I own, either commercially painted or those I painted myself. I took some more photos on the layout under 5000K LED bulbs and shared them with a few friends who model the B&O and look at colors critically. They agreed that it was green I was seeing. For context, let me add that B&O boxcars of that era were painted a very average brown color until the mid 40s when a much more red freight car red was introduced. That later color is the color many see in color photographs of 50s era B&O boxcars. These changes in color also go along with changes in lettering. These were detailed by Chris Barkan and this information is available on the B&O Railroad Historical Society website. And to make it more difficult to know a true color there are not too many color photographs of the older brown color.

A relatively unweathered B&O boxcar in a 40’s era Jack Delano photograph. Library of Congress Collection.

I should have stated this up front and it is very important to say. I am not, and I repeat not, someone who focuses on exact color matches and original drift cards in my modeling. But, I do expect that when I purchase a well detailed and accurate prototype model that the color be close to the prototype. I don’t know the correct color for every model I buy and I trust the manufacturer of a high end product to get it close. This was not close by my standards for a B&O boxcar, but it may be fine for many others.

So what to do? I am aware that the manufacturer worked with the BORRHS so I assume they did their due diligence, so I wouldn’t expect a refund or a new model. Things happen. I looked at this as an opportunity to learn a little more about the color wheel and see how I could make this model match the other cars in my B&O car fleet. Many of the other cars in my fleet are Rapido, so this is not an indictment of their efforts. I certainly appreciate all the steam era models they have brought to the marketplace and support their efforts as much as I can.

So learning a little more about the color wheel and using techniques shared with me on the Real Steam Freight Cars .IO group, I decided to try to tint a matte overspray with a color that would shift the color of the car closer to what I believe is appropriate for a B&O boxcar painted in the late 30s or early 40s. I assumed this era based on the stenciling recreated on the model. As I detailed in a previous blog post, I now use Winsor and Newton Galeria Matt Varnish (I switched from Dullcote for performance and economic reasons, see previous blog), which is water soluble and can mix with the Vallejo Model Air colors that I choose to use.

I loaded some Matt Varnish in my airbrush and added a few drops of Vallejo Fire Red and less German Red Brown (about 5 to 1). I sprayed it on some white paper to see how much red brown would be applied to the model. I chose a red brown mix as that is opposite green (blue and yellow mixed) on the color wheel and should mute out some of the green in the boxcar’s appearance. It took two coats and the overspray turned the white lettering pink, there was a fair amount of red in the tinted matte varnish.

It might not have been the best solution, but I was trying to save myself from having to repaint and decal the model, so I used a microbrush to quickly wipe off some of the overspray from the lettering while it was still wet. It worked for the most part, but up close (last photo in this post) you can see where the overspray was wiped off of the car body outside of the lettering. Hopefully it’s not too noticeable, but it did cause me to go a little heavy on the weathering. Not inappropriate for a ten year car, I hope.

The result of the tinted matte overspray next to a more weathered model shown in the previous photo. This photo is also taken under the same 5000K LED bulbs I use on my layout.
These are the colors I used to tint the matte varnish. The Fire Red was added about 5 drops to 1 drop of the German Red Brown to the paint cup of Matt Varnish.

I added some paint failure spots on the roof with gray paint, blue washes and assorted colored pencils, then weathered it with black pastels to simulate soot and a hard life in the Northeast. The sides were lightly sprayed with a gray/black tinted matt varnish to add some lighter weathering to look softer, but similar to the roof.

The last details I add were new decaled reweigh and repack stencils closer to 1950, some faded chalk marks with sharp colored pencils, and a couple of brighter chalk marks with decals. I added spots of Pledge for a gloss decaling surface where needed for decaling, then after heavy doses of Walters Solvaset, covered the decal spots with matt varnish and some gray chalks to fade them a little. The trucks and wheels were sprayed with Vallejo NATO Black like most cars on my layout. The couplers were replaced with Kadee #158 scale head couplers. I still need to add some rust paint to them.

I hope this provides some helpful information to others and allows them to rescue this model or others using similar techniques. I certainly wasn’t expecting or relishing this challenge, but in the end I learned some new things and ended up with a model that fits my layout well. That’s got to be worth something!

This is the finished model on my layout. The color is very close to the brown freight color I would expect.The model depicts a car painted in the late 30s or early 40s as it might appear in 1950 without a repaint.
And here is a roster shot of the finished model in higher resolution.

Enter your email address to subscribe to this blog and receive notifications of new posts by email.

Ilchester, Lees, and a Little Beyond; The Big Picture(s) of Progress, Part Two

The two track DCA yard is behind Tracks 1 and 2 of the Old Main Line just east of Ellicott City, Maryland. The short bamboo sticks on the right side of the photo are a mock-up for tree locations. The can take a beating and will let me know if they will be in the way when operating the layout.

The last time I gave a photo tour of the first two modules in July, 2019 (link to previous post) there was a lot of plywood showing, no fascia, a little backdrop, and no construction on the next three modules leading into the return loop.

This is where we left off, the fascia needs to be added to give the station a little more real estate .
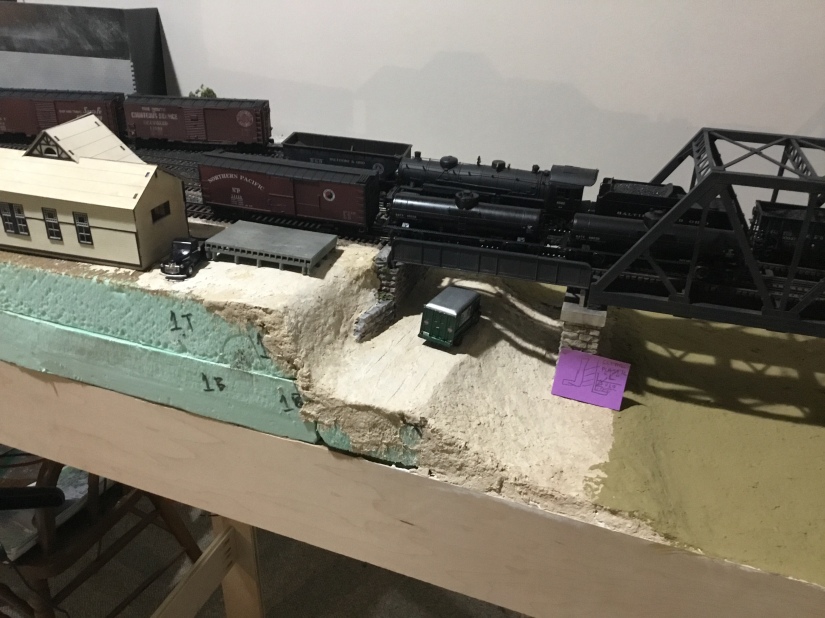
And this is the same area in January 2022. Still some scenery to complete and a photo backdrop to add.

The Patapsco River in the first photo is dry, the station isn’t complete, and no fascia has been added. Since then I have finished the river, realized the Woodland Scenics Realistic Water material is a very thick fluid, even when “cured”, and is very, very slowly spilling over the edge of the layout. That will be a new project. The station is complete and mounted on a “concrete” foundation like the prototype after a later 40’s reconstruction project. I have started on the adjacent small freight house, I need to complete the roofing and the boards enclosing the raised platform. I will add a short blog on building that structure in the future.

I’ve been able to build four more modules and get the layout moved against the wall to allow the Ilchester Tunnel to reach staging in the unfinished part of the basement. One of the new modules is inline with the first two and the next three are set perpendicular to create the return loop that will take my Old Main Line back behind the backdrop to two modeled areas and then into the remote staging location and its return loop. This will allow continuous running.

You can see light at the start of the Ilchester Tunnel which is the staging in the unfinished portion of the basement.
This January, 2019 photo appeared in my previous Pictures of Progress Blog. Only two modulars are built.
This is the visible return loop at the Doughnut Corporation of America plant and will divide the layout into two halves.
This is a view underneath the layout from the same end of the return loop. The original three modules appear at the far end.
An Updated Layout Sketch. Sykesville has moved behind the backdrop and the Doughnut Corp. of America is no longer a hidden industry it is now a large, visible structure.

I was able to add fascia to about 40% of the layout. I used 1/8″ masonite as it can be bent to fit the curves of the layout. The layout is designed to follow the curving Patapsco River, just like the Old Main Line that was laid out to follow the river through gaps in the hills and mountains west of Baltimore. I wanted a smooth finish so I used Bondo Glazing and Spot Putty, it is a one-part product, don’t use the two-part product that is too hard to sand similarly to the masonite and is too thick for thin gap filling (two part glazing putty has a resin and a hardener like an epoxy, not great for this application). The Spot and Glazing Putty product works great on wood trim for the house also, it is red and hard to cover with paint, but doesn’t shrink over time and crack.

A joint in the hardboard fascia with Bondo Glazing and Spot Putty applied to create a smooth transition.
After painting, the joint disappears and similar joints on the layout have gone through several season changes with no cracking.

I intend to build the very large Doughnut Corporation of America milling and manufacturing plant using an ITLA modular building system. I developed a mock up of the building that is less than 50% of the actual size, but it is large enough to portray the imposing size of the building. And it substantiates the need for a two track yard to serve it and the two track siding within the plant. It will be the primary operating feature for the 1950 Way Freight as it heads west every other day. And I presume it was serviced on all days, so it may be switched on the opposite, every other day east bound trip of the Way Freight. It was a priority customer over time, so it might have even rated a special train from Baltimore when needed. I need to find some more contemporary operations sources.

The mock-up of DCA using ITLA actual-size paper templates.
Laying the mainline tracks headed into the curve past DCA that heads into Ellicott City, MD on the prototype.
The mainline tracks are to the right, with the two tracks on the left serving the DCA plant.
Switching west of the DCA plant in 1952. At the top right of the photo, one can see the bridge leading into DCA. The left two tracks are the mainline, the two on the right are the small yard serving DCA.

Behind the backdrop of my peninsula layout is the second half of the visible layout of the Old Main Line. Beside Ilchester, my favorite layout element is Sykesville, Maryland. I was based from the old passenger station in Sykesville when I worked on the track gang during summers in college. The base for the Life-Lke Main Line station injection molded plastic kit is seen in the photo below in an approximate location. It was modeled after the Sykesville Station and I bought one when it was released many years ago, knowing I would have a spot on a layout someday. I haven’t planned out the entire area and need more information about Sykesville in 1950. I need to build the station next and would love to have a color photo of the station from the 40s or 50s, if anyone knows of any, please drop me a message.

The visible layout behind the backdrop. Sykesville will in the first location on this side of the peninsula, further along before going through the wall into staging will be Gaither Tower and passing siding.

Finally, I decided to “brand’ my layout by developing a name for the layout, calling it “the Original Old Main Line” referencing it’s setting on the B&Os Old Main Line, the original part of the United States’ first common carrier railroad.

“The Original Old Main Line” logo. Developed using the B&O’s “Linking Thirteen States” logo and matching the unusual lettering style. Bruce D. Griffin Artwork.
A short video overview the layout progress.
Getting closer to the photo below, needing a backdrop with trees and some 3D trees on the granite above the tunnel portal.
The station has been abandoned in this 1960’s era photo. Bill Hopkins Photograph.

Enter your email address to subscribe to this blog and receive notifications of new posts by email.