
I have recounted the background of the development of the MJB Models kit for Ilchester, now I offer an overview of constructing the model for my era. The blog that recounts the background research is at, https://bomodeling.com/2018/12/04/ilchester-maryland-part-one-the-bo-station/. The kit was a gift from my friend Don Barnes, so I don’t know the price, but it was not inexpensive and the quality is reflected in the well thought out design by Mark Bandy. This model represents a signature structure on this part of the Old Main Line and instantly recognizable to those that follow this part of the B&O.
The instructions for this kit are pretty straightforward and consist of numbered and lettered parts diagrams for each sheet of laser cut parts and then a series of exploded diagrams of the construction process. They are more than adequate to build a great model. However, the walls are created by layering-on parts to create built up subassemblies of multi-part windows, multi-parts doors, and various sidings so it pays to test fit twice and glue once. I am sure this was done to allow the model to be painted prior to assembly, thus allowing a great rendition of a detailed two color paint scheme. My challenge was to do the kit justice.
Unlocking which color to paint which parts prior to assembly was the most difficult part of the project. And related to that, which paint colors to use to duplicate the colors of a particular era. The early 1960s photo below is a good rendition of the Cream and Black colors I remember seeing on old structures painted in this combination. It also matches favorably the Cream color shown on the 1939 paint chip card I received in an email some years ago. To match it I airbrushed Vallejo Model Air 71.270 White (it is not a pure white) with 10 drops of Vallejo Model Air 71.244 Sand Beige added to the almost full bottle. For the Black trim I used Vallejo Model Air 71.251NATO Black, it is a weathered flat black that has a slight brown hue that matches my recollection of the color. Though somewhat subjective, it is what I have chosen.


While the literature indicates the primary color of a station in my era is Cream, I often see B&O models painted the darker buff color. I always remember a light color, such as shown in the preceding photo taken sometime after 1950 and before 1970 when the station no longer appears in photos of the area.
The first question to answer in building the kit was on which sheets does one paint which color. The photos below will help someone building thIs kit.

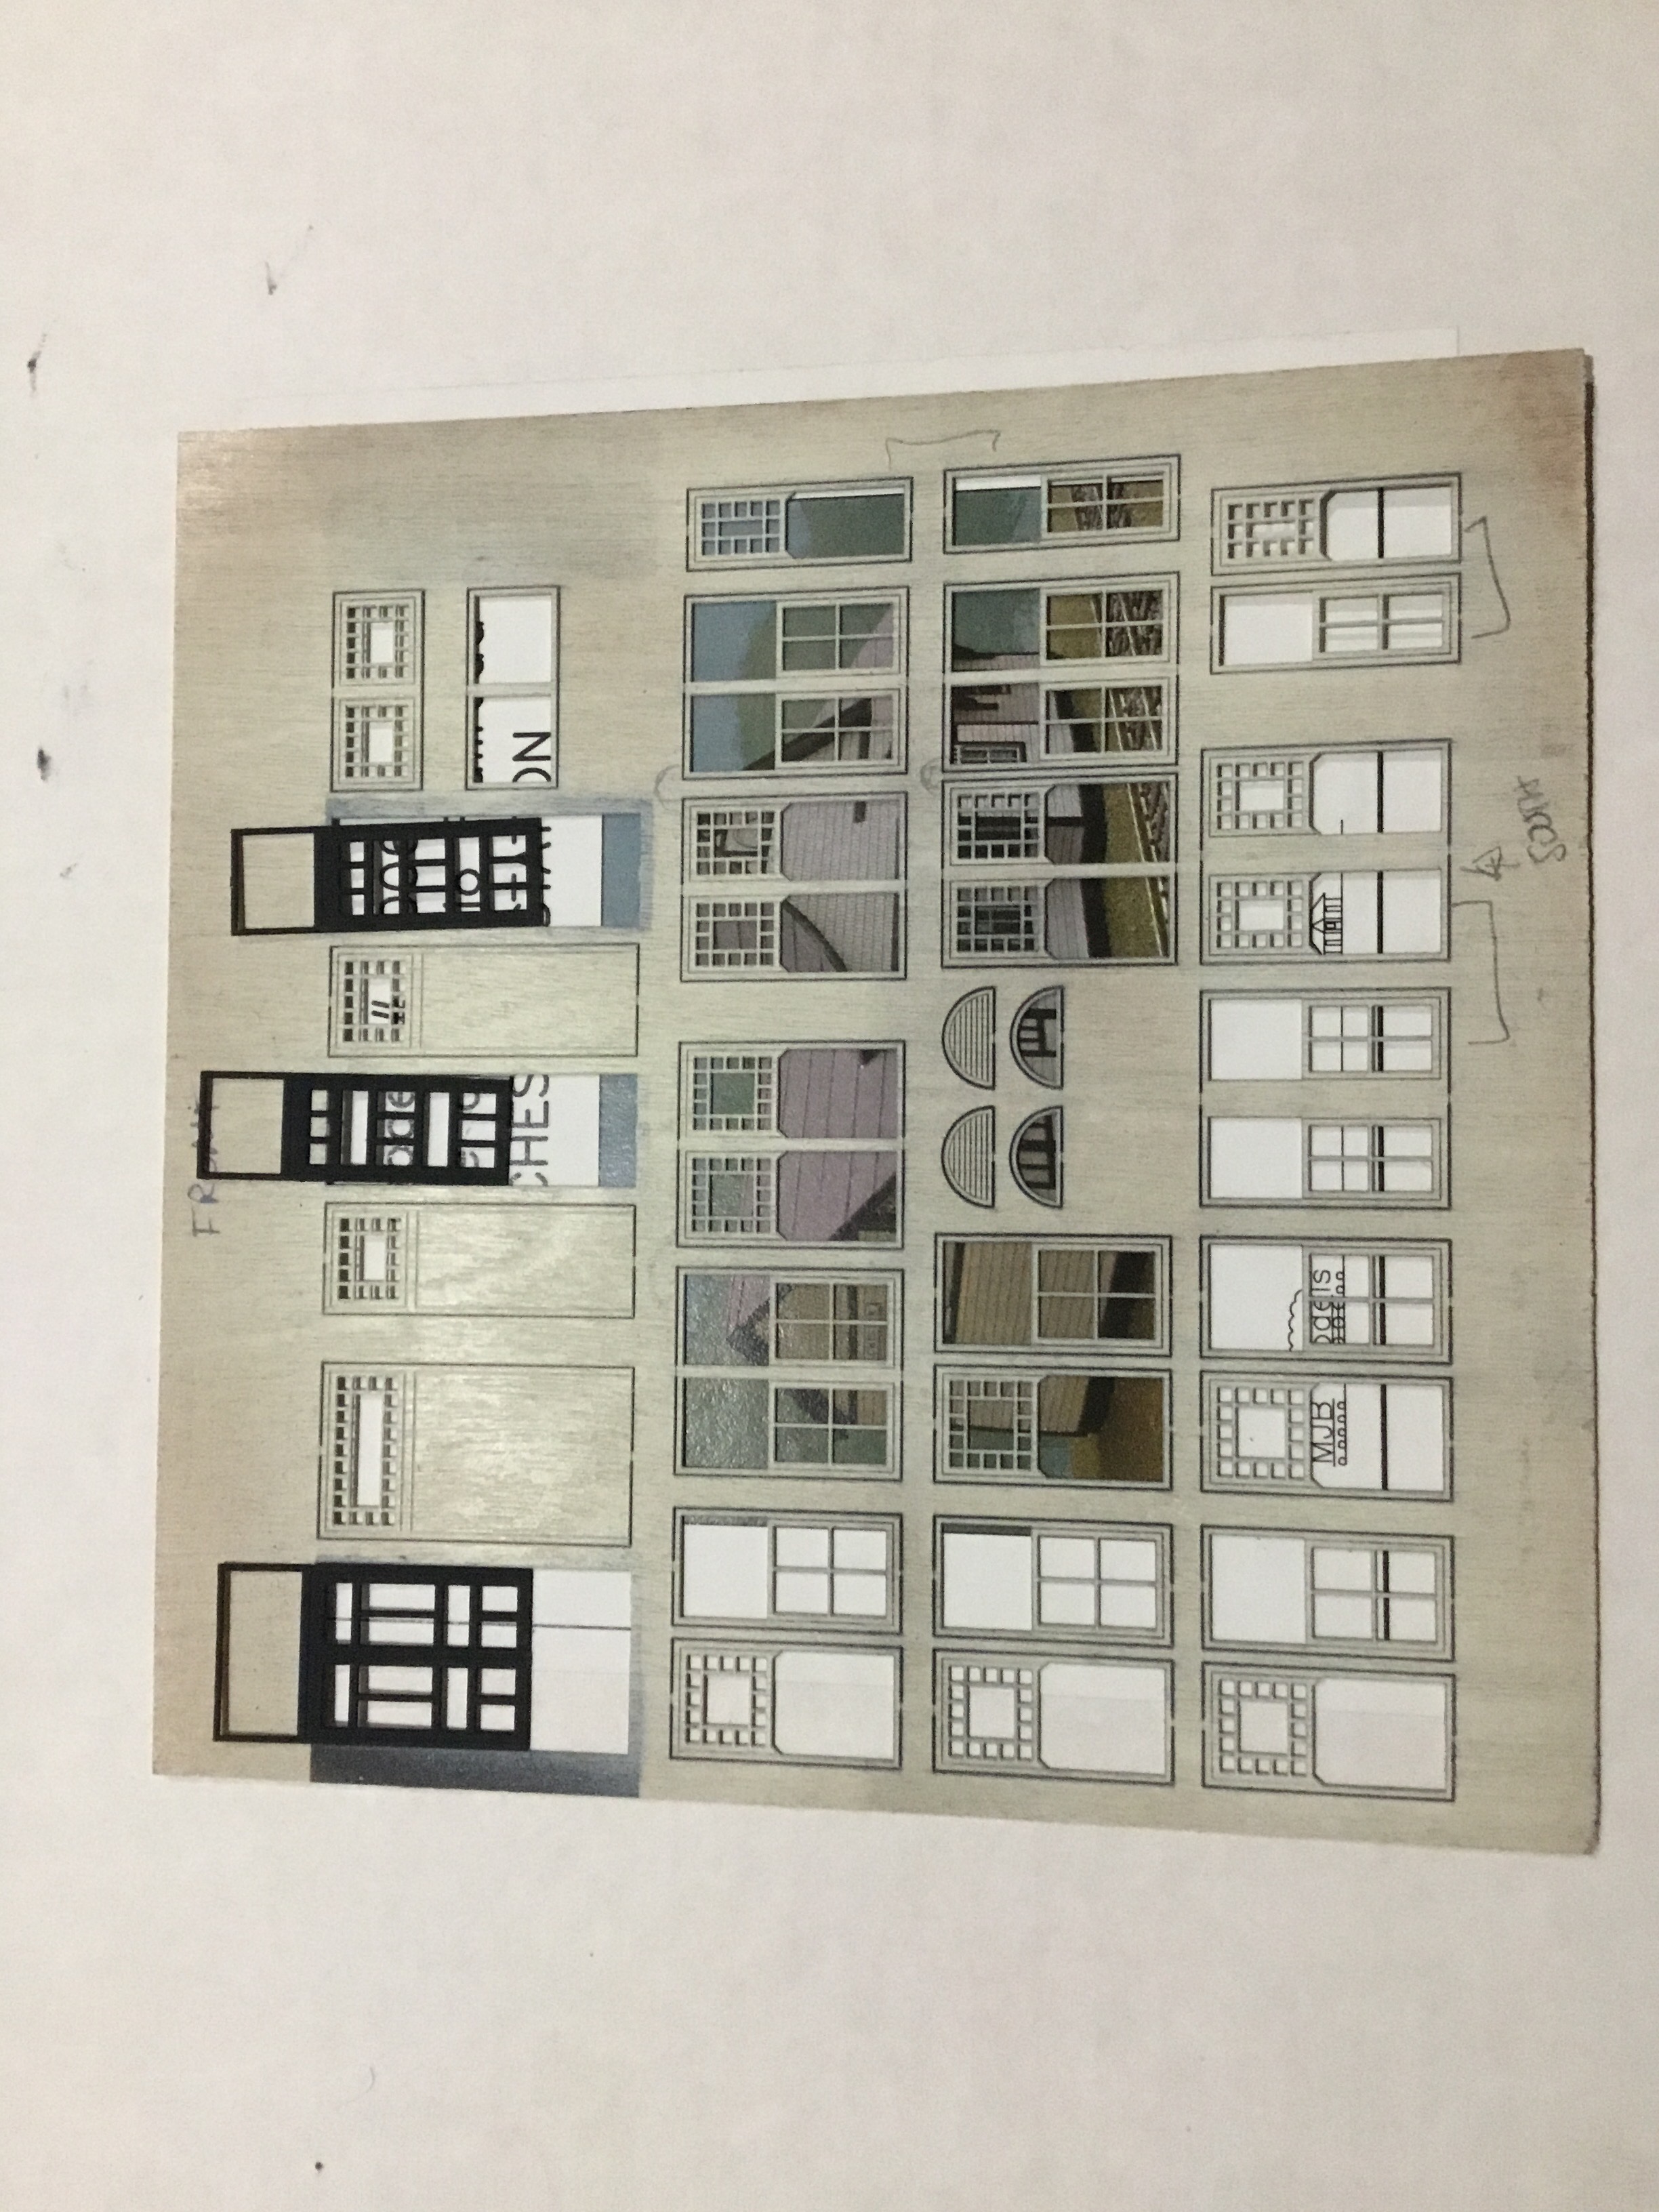

The kit’s parts are well cut and it only takes a slight trim with a razor blade to free them for their laser-cut sheets. I refrained from cutting the parts out until I could paint them to help them resist curling from the application of paint. I don’t know if it would have happened, but I thought it was a good precaution. I glued the basic frame together with sparing amounts of yellow wood glue and clear coated them. I did this long before I looked at the rest of the kit as I needed a mock up of the station for layout planning purposes. As seen in the photo below it was a pretty solid foundational structure and a perfect stand-in structure for the finished product.

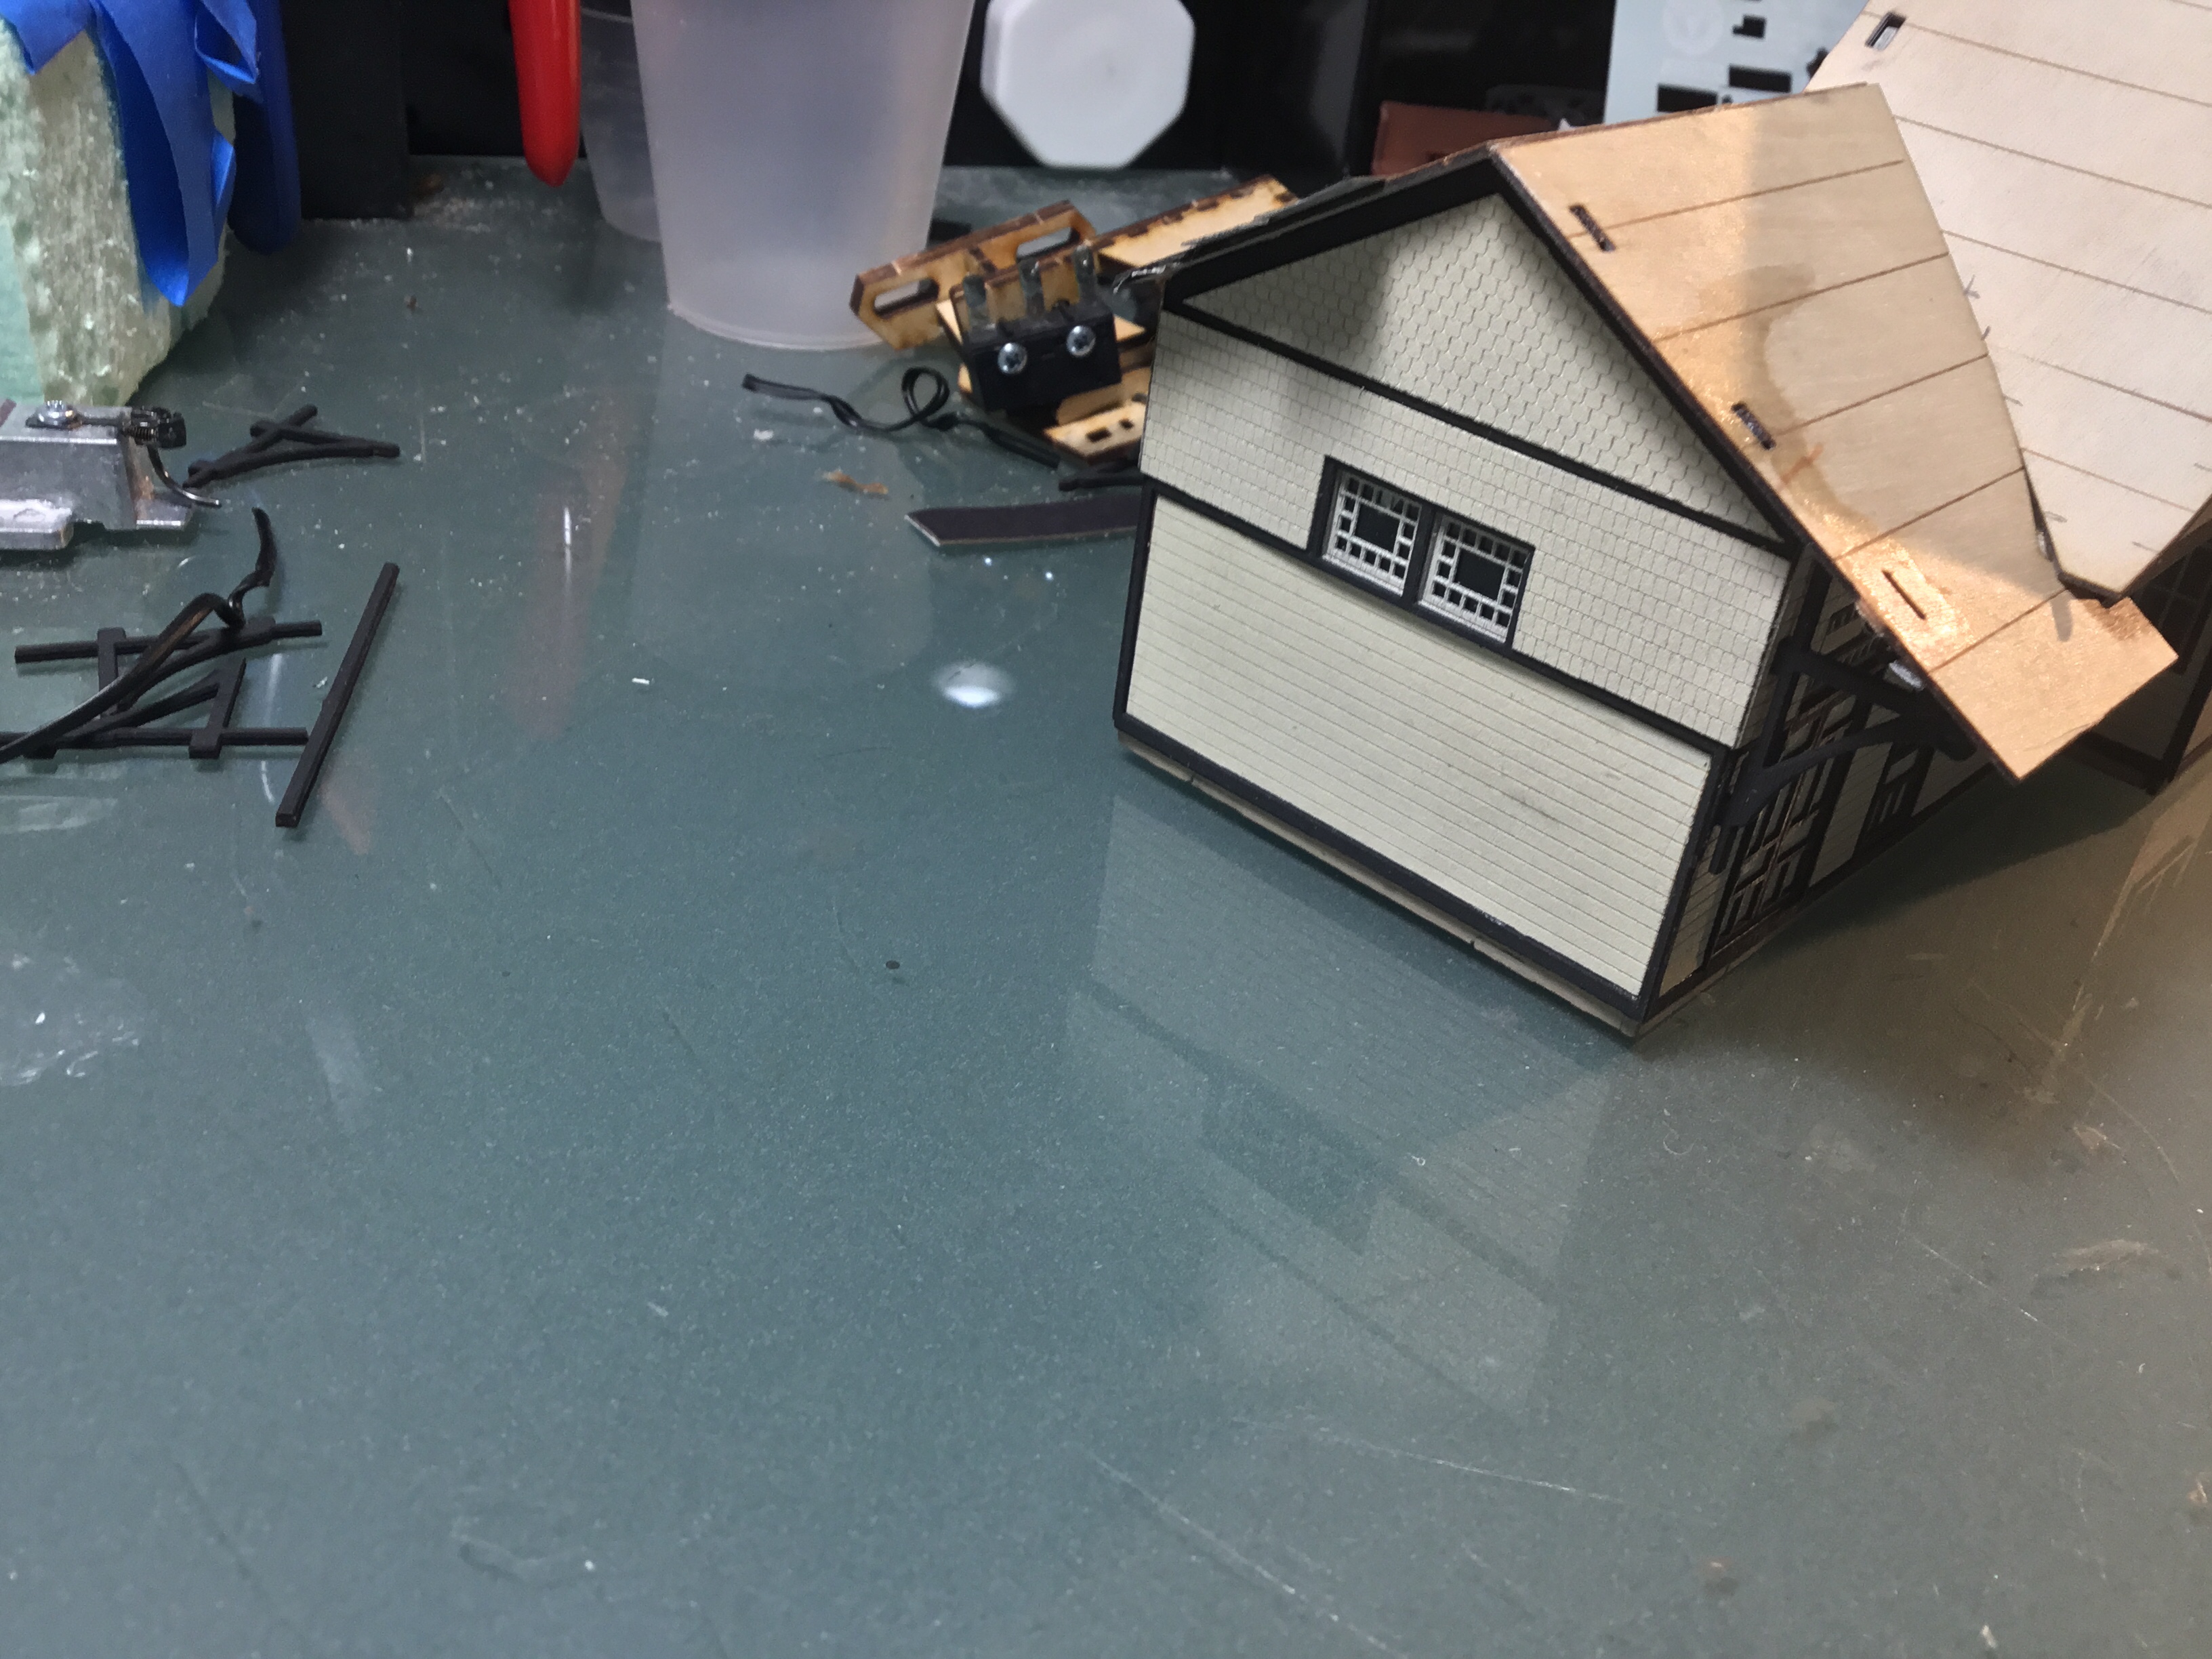
I started building the kit a little out of order from the instruction sheets as I wanted to start on the side hidden from normal viewing on my layout, the trackside. I assembled one door and window on the north side, west end. The window and door attach behind that black painted intermediate piece that is covered by the adhesive shingle sheet on top and the siding piece inset on the lower portion. I added the vinyl glazing supplied with the kit, but cut it to window size and used canopy glue instead of the supplied double sided tape as the space was too small for much tape to bite. The glazing has to no wider than the door or window to fit within the cutout of the basic structure assembled first.

The pieces fit precisely, so before I glued this piece to the basic structure I started building the other window, door, trim, shingle pieces. I wanted to be sure my building techniques were as precise as the laser cutting. I was close. I left the edge trim pieces unglued where they met the next wall to allow the corners to be glued together. These are black trim pieces and they look better as precisely matched as possible.


I don’t remember ever building a structure kit that went together this well. I took my time with each step and test fitted every piece before letting it set overnight and then I came back to glue it the next day. I set it up on a different table and just did one step a night. It was hard not to rush, but the kit deserved this level of attention.
Progression on the kit went well as you can see it coming together. I repeated the steps for each side and it everything fit as expected. I was sparing with the glue and test fitted parts multiple times. The adhesive-backed, laser-cut parts fit very well, but there was not much dwell time. When you place an overlay part in place it didn’t take long for it to be very strongly adhered.


Interior walls seem to be front to back (north to south) as one can see through from the trackside out the backside windows in period photos. Speculation would put the passenger waiting room on the west end with a door for in and out on the trackside. Passenger trains had been discontinued on the OML in 1949. There are no doors on the south side away from the track. The center portion of the station would probably be occupied by the station agent’s office and the east end a small freight storage area. This was apparently supplemented by the separate freight house to the east (a future blog post).


The interior walls were constructed from scrap styrene as the interior is not detailed, but I wanted someone looking very close to see the separation and I wanted to add some lighting to the center freight agent’s office. Looking at lighting in photos in a previous blog I noticed three shaded exterior lights on the trackside of the building. I turned to Woodland Scenics products as I have success with them lighting the Point of Rocks station. The HO scale lamps seemed a little oversized so I used the N scale JP5658 Gooseneck Wall Mount Lights for the exterior pendant lights and one JP5740 Warm White LED Stick-On Light for the freight agent’s office overhead light. These were all connected to a Woodland Scenics JP5701 Light Hub under the layout. The next photo shows my less than neat wiring, my goal was to make sure the wires were secure and out of sight inside the structure and could be installed without drilling holes in the model.

Before the roof sections are installed, I added one final detail to the interior, the windows in period photos show window blinds. Take a look at the prototype photos in the previous blog referenced earlier. I added these with trimmed pieces of manila folder, cut slightly wider than the windows to give them a slight offset and not appear glued to the window “glass”.


The roof intersections have some unusual angles that I would have trouble creating in 1:1 scale, so slight trims and test fits helped me get them very close and then use the roofing material to close the gaps. The tarpaper roofing material supplied is excellent and guidelines for installation are lightly laser-cut into the roof sections. A slight overhang of the tarpaper was needed to cover the facia boards that are added near the end of construction.


The final facia trim work adds the finishing touch. There are some precut pieces that are too short, but this is easy correct by trimming some extra boards from the sheet the trim is cut from and blending them in with canopy glue and NATO black paint.

Currently MJB Models is not producing kits and Mark’s website is dormant. But if you ever want to build an excellent kit, please try one of his products. As I built it, my only trepidation was putting in as good an effort into building it as he had put into engineering and producing the kit. This is not a slight to anyone and I love building Al Westerfield’s older kits, this is on par or might even exceed that level of design and detail, though in a structure.


Incredible work! I enjoy following your progress. Where can I order the kit for the Ilchester station?
LikeLike
Do you have any contact info for Mark Bandy?
I wanted to buy some of his kits, but the website went dormant like you stated.
Thanks,
Dan Sobieck
LikeLike
Dan,
I have tried several times in the past three years through different methods and intermediaries with no luck. Sorry.
Best Regards,
Bruce.
LikeLike
I’m about to start this model, and your article will be very helpful. I discovered this depot and fell in love with it around 1961, when my Boy Scout troop began camping in Patapsco State Park. A chance encounter with the station agent just before it was razed in 1964 resulted in my being given several artifacts – including the station sign, Railway Express sign, ticket office window, and two waiting room chandeliers. I still have most of them. The small mailbox pictured on the side of the building is probably the one I saw in the attic, but couldn’t reach after stacking as many boxes as I could find. It was a really high ceiling.
LikeLike
John,
That’s great, I’d love to see the artifacts. I have more photos of the depot I can share, if you want them. Before I could build a layout this became a research obsession and found out a lot about the station, but I would love to hear about first hand accounts. Drop me an email if you want chat more. BDG1210 AT GMAIL. Best of luck with the kit, it goes together great.
Regards,
Bruce
LikeLike