One of my first tests of what I wanted to build as part of a future layout was a simple diorama to take photos for the new B&O Modeler. I have had this prop for a while. The parameters were simple; lightweight, portable, removable backdrop for outdoor photography, double mainline, river side scenery like the B&O’s Old Main Line, and inexpensive, using materials on hand.
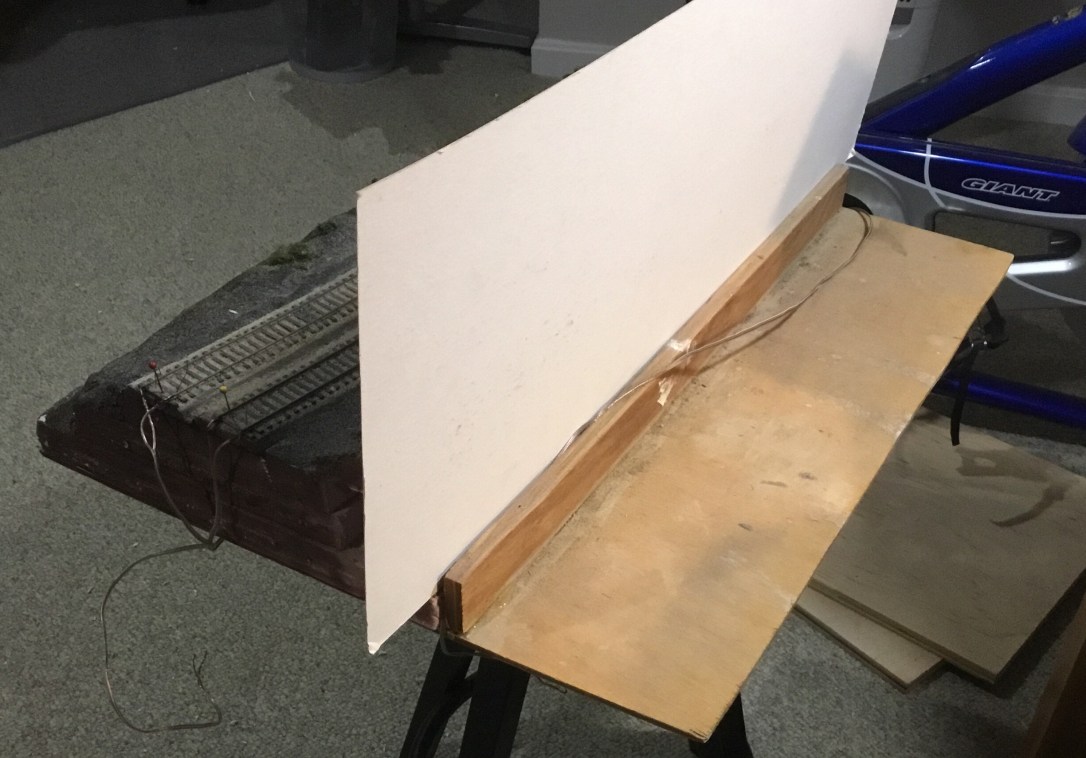
A thin sheet of 1/8″ luan was in the garage and made a lightweight base. Some two inch foam insulation, Code 100 flextrack, scrap posterboard, ballast, ground foam, and some Sculptamold rounded out the materials list. I cut the luan to a 18″x 24″ rectangle and added some 2” foam for base scenery. I covered it with Sculptamold and painted it brown. The idea was for the view to be from across the Patapsco River, so the front of the scene sloped down to the river and was covered in cinders. This is meant to be 1950’s view but generic enough that it could be used as a background for trains from the last 100 years.
The backdrop is a piece of posterboard left over from one of my son’s school projects. Some foggy, gray spray paint and a poor attempt at clouds added a neutral background. Don’t want to steal the show from the models. It slips into place between the foam scenery base and piece of scrap approximately 3/8″x 1″ glued to the base.
Some weathering of the rails with a spray can, then gray ballast, some ground foam and we have a lightweight photography prop. While it is slightly noticeable, I used a little more red-brown to simulate additional “brake dust” on the downhill track. I usually took it into the backyard with trees in the distance to get my shots in full sunlight. One key hint is to put some long pins at the end of each track. The cars roll pretty easily with the slightest incline and one rolling off the end would ruin a day.
After 15 years of service, it might be time for a refresh on the backdrop and scenery. Sounds like a great opportunity to try some new techniques before I try them on the layout. Time to get a static grass applicator and break out the airbrush.
Finding information about the the B&O Station at Ilchester, MD became part of a research project that involved multiple people and continues with the sharing of the information with local historical societies. Sometimes I think we are doing research to save our history but not sharing it with the broader community to insure it meets the needs of a bigger audience. My son probably won’t care about the ladder construction detail on an M-15-k boxcar, but hopefully he can learn about the rich railroading history along the Old Main Line (OML] and this effort added to that body of knowledge
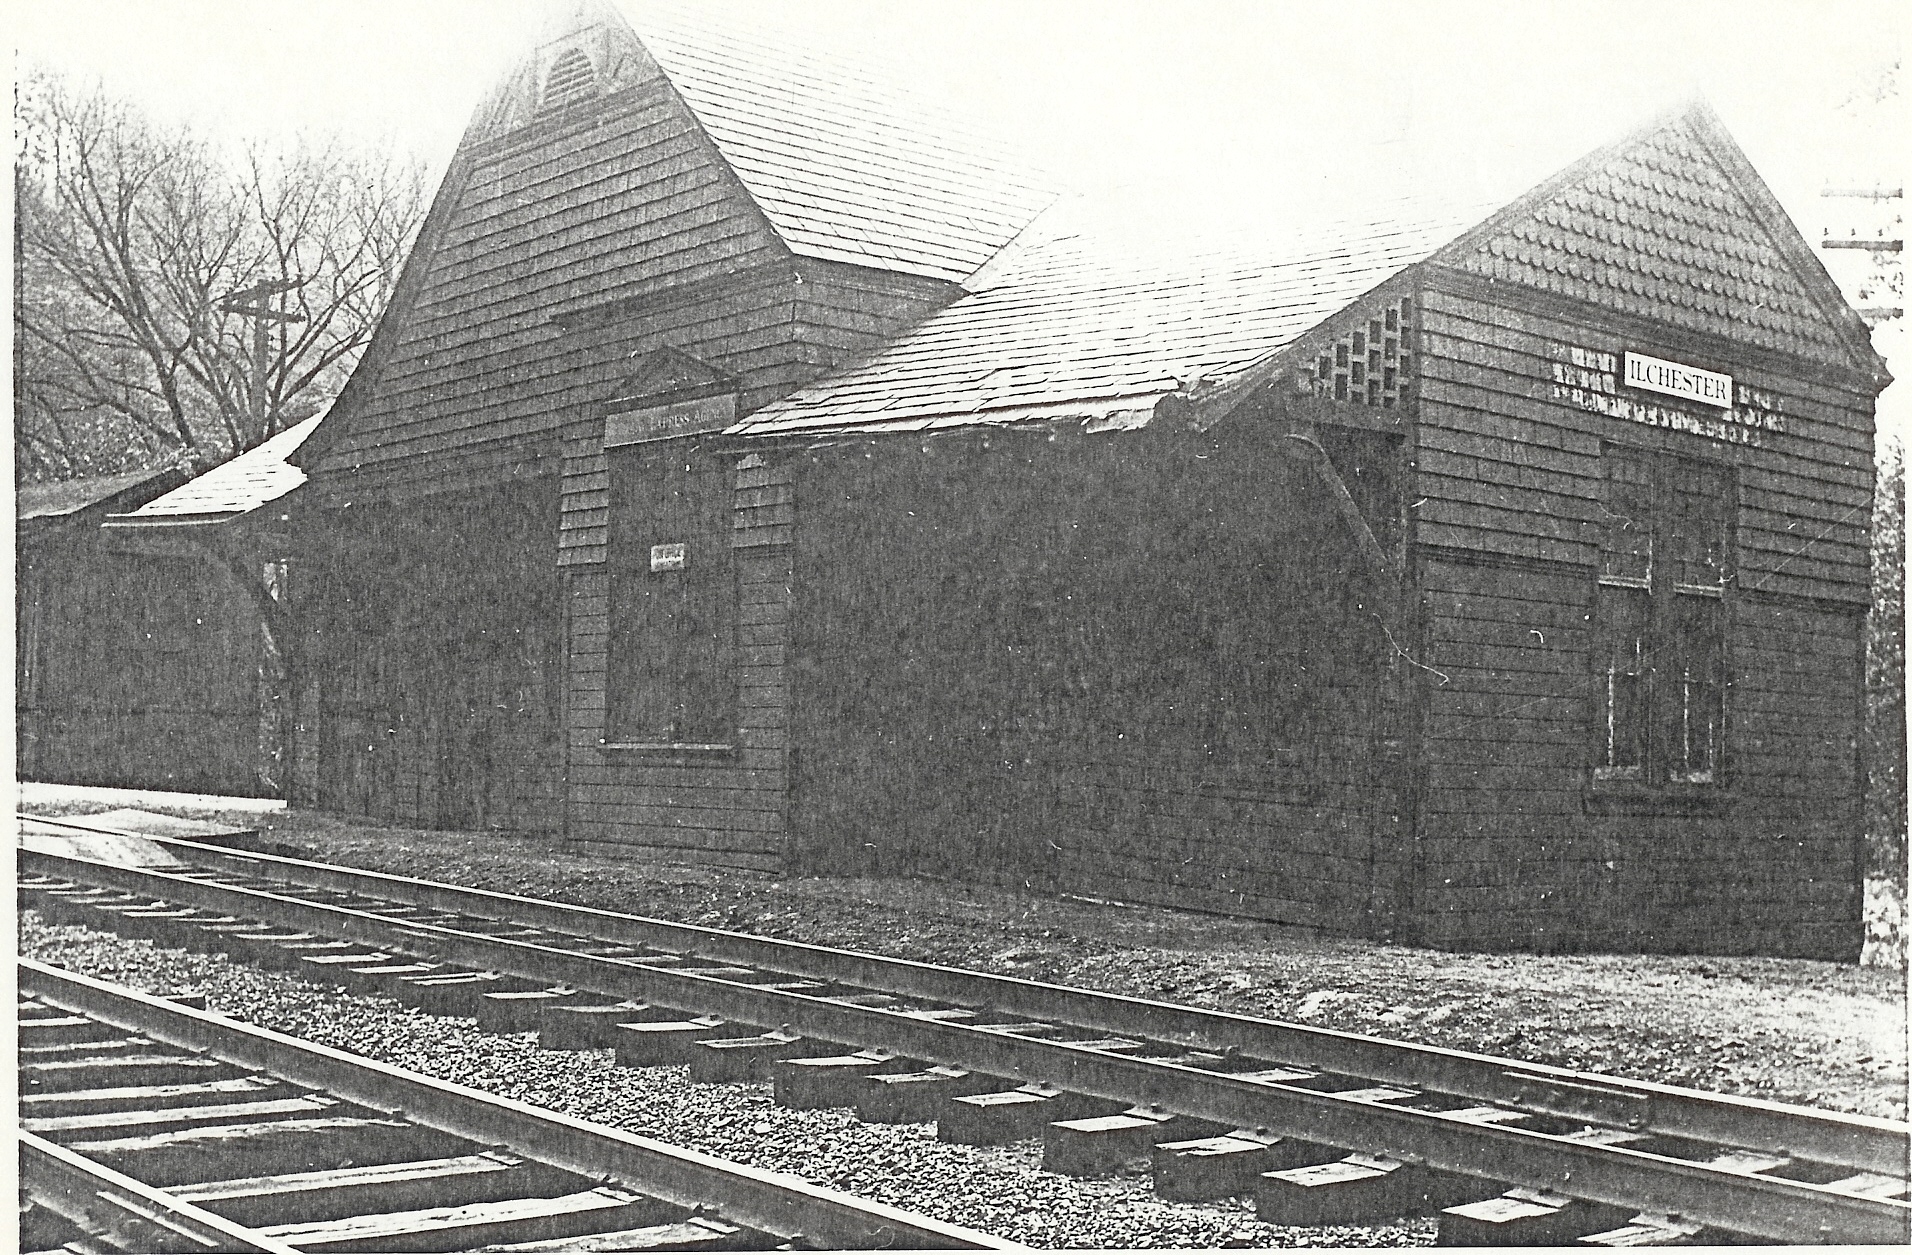
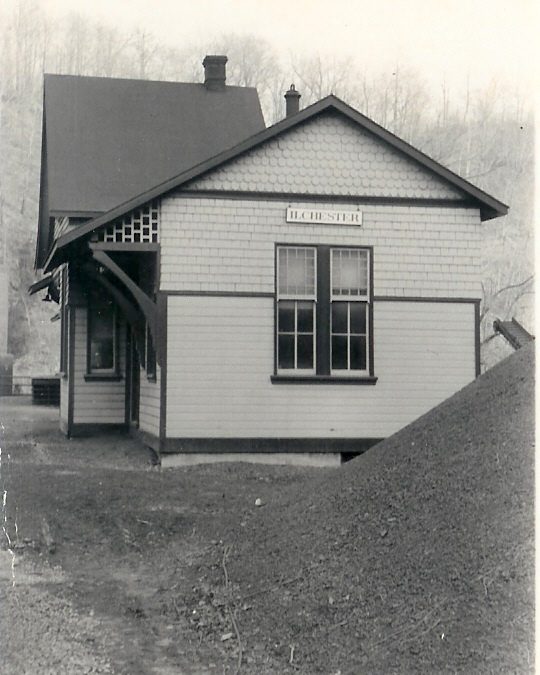
Sometime back in the late 90’s or early 2000’s I started looking for information about Ilchester Station after seeing one picture of the OML emerging from a tunnel, crossing the Patapsco River, then a small road and running next to a very unusual B&O Station.
1941 View from Buzzard’s Rock of Ilchester Station. Herb Harwood Photograph.
At the time I was part of a small list-serve of B&O OML Modelers and we exchanged information about our favorite railroad topic. Working in universities most of my career I had access to the some of the first public list-serves about Genealogy and learned how to use them for other hobbies. That first Genealogy list-serve had about a 100 or so members and was state of the art back when PCs had green screens. Remember green screen monitors? It taught me the power of information exchange long before Yahoo Groups or now .IO Groups.
We exchanged information about rolling stock, sources, and anything we could. Exchanging photos online was out of the question, only the DOD had that kind of bandwidth. We saved photos on CD’s and sent them by snail mail. I remember Bill Hebb, Nick Fry, John Teichmoeller, Don Barnes, Bill Barringer and a few others being on the list. When I asked a question about Ilchester Station, Bill Barringer (author of the definitive book on the B&O’s Q-Class Mikados) sent me a CD of photos he had from before and after a B&O renovation project to upgrade the structure in the 40’s or 50’s. The dates were approximate, but those photos have turned out to be the best source of information about the station in existence. Bill has since passed. What a great thing to share with the larger community. Thank you John Teichmoeller for doing just that.
Looking east toward Relay Junction past Ilchester Station, date unknown, B&ORRHS CollectionLooking east toward Relay Junction past Ilchester, March 2018, Bruce D. Griffin Photo
So we had photos of the station and someone remembered a set of erection drawings for the station existed at the Smithsonian. A couple of years later one of the members of this tribe found the drawings and shared them with the group. They were not even close to the photos of the actual structure and things like roof pitch were so different we thought that they couldn’t be the result of a renovation, too expensive with little purpose. As time passed older photos were found and we realized the plans were never built. I guess we should send the photos to the Smithsonian and let them know the station turned out different than planned.
Ilchester Station Thumbnails, 1940’s, Bill Barringer Collection
South Elevation
Northwest Elevation
Northeast Elevation
Interior
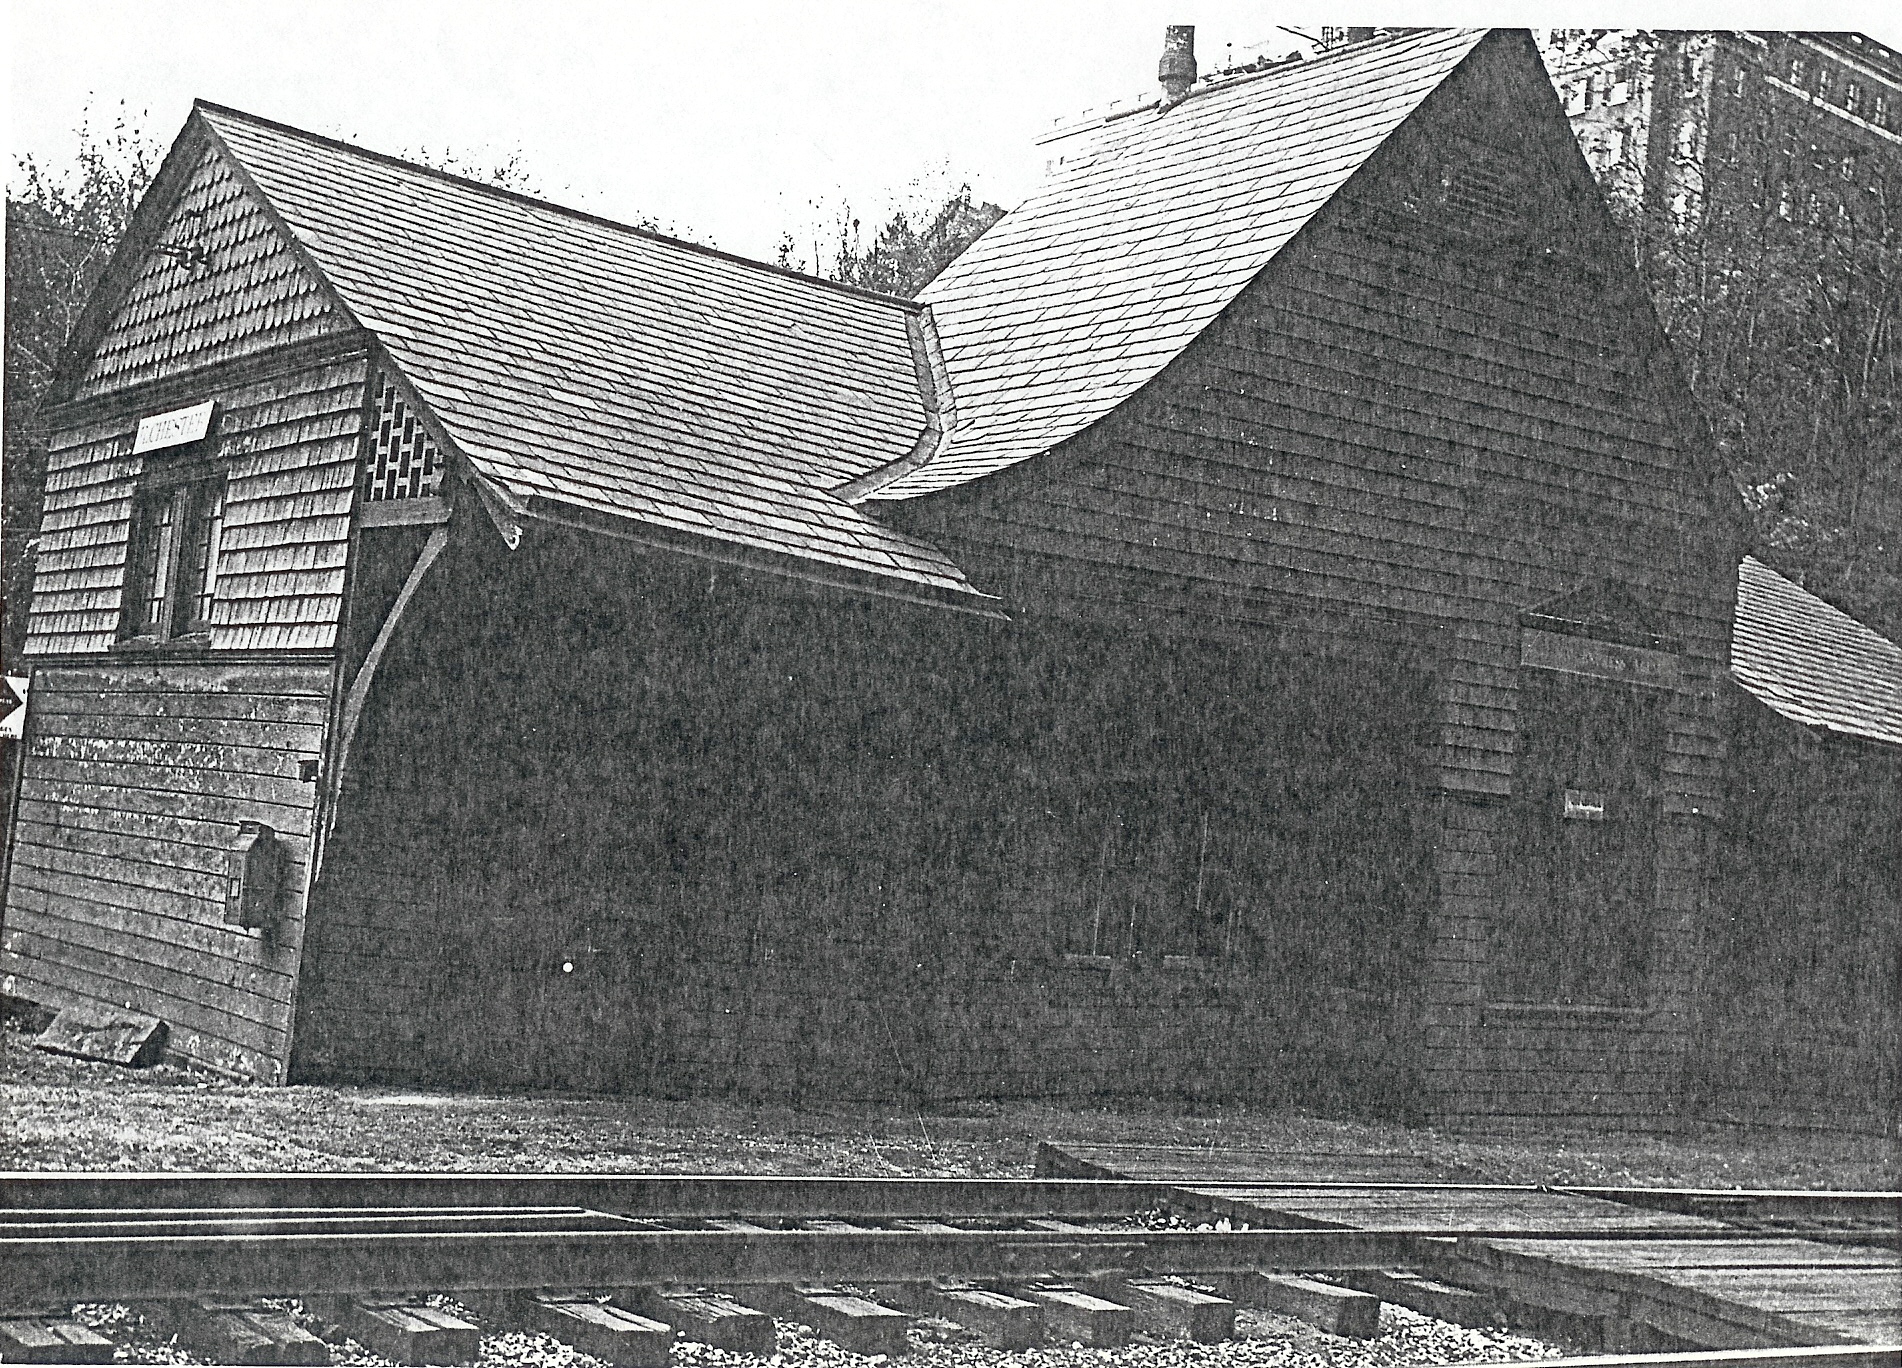
Ilchester Station Thumbnails, 1954, Bill Barringer Collection
North Elevation
West Elevation
North Elevation
East Elevation
South Elevation
North Elevation
North Elevation
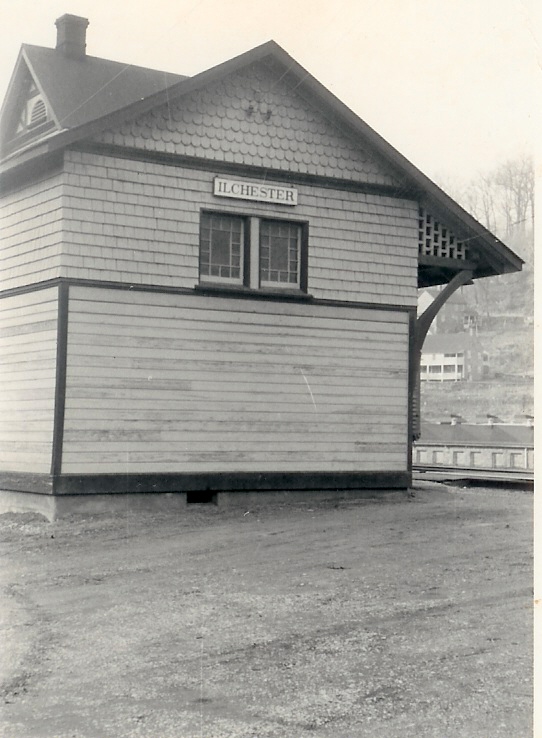
One of the people in this research group was Don Barnes and he was building a huge layout that included the entire OML, so he needed a model of the station structure. He contacted Mark Bandy of now MJB Model Trains, https://mjbmodeltrains.com, to see if he would be interested in producing laser cut models of some additional structures, including several along the OML. Bill Barringer had taken the extra steps to photograph all sides of the structure in the early 50’s and with those, Mark was able to produce a kit for the structure in exacting detail. It wasn’t cheap but I was able to trade my research skills and resin kit building skills with Don and he traded me for one. Thank you Don.
The more we learned about the station and the OML realignment in the early 1900’s the more questions arose. Even old postcards became reference material. At some point between maybe 1920 and 1940 a freight house was added next to the station. No one has found a photo of more than an edge of the structure and an overhead shot from above the tunnel, across the Patapsco. Similar to the station it is not anything like a B&O Standard Design. It has board and batten siding, something not too often seen on B&O structures in the east. That and the coal trestle on the north side of the main tracks across for the station are a story for another time after additional research.
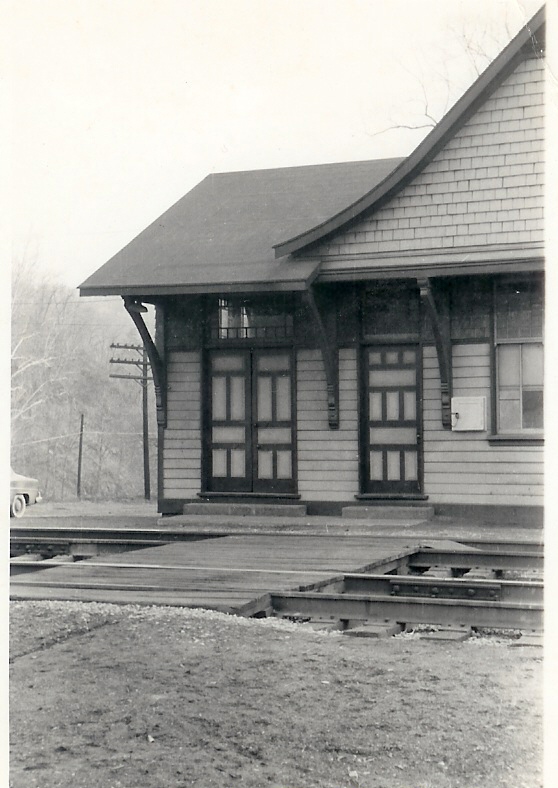
The Agent ready to inspect a west-bound through Ilchester Station, 1959, B&ORRHS Collection.
if you are wondering why I was complaining about a lack of photos when there are so many in this post, I will add that this is about all that could be found from twenty years of digging. Building the station kit deserves a little more attention. This is the first step below. I will post another blog about it, as it is well engineered, and should produce a top-notch foreground structure.
So for me as a B&O modeler and a member of a long serving B&O family, I stake claim to being part of the heritage of the first common carrier in the United States. The claim of first for the B&O relates to being the first non-captive railroad in the Americas. It is specific because people were moving things on rails before its charter in 1827. It is all okay, and it is significant that the mainline I am modeling was part of that first US mainline between Baltimore and Ellicott Mills.
However, when we speak about firsts, we have to defer to my English cousins. For me that is literal as my mother was a “war bride” and emigrated to the US in 1944 after serving in the WWAF and marrying my father who was serving in the USAAF.
That brings me to one of my family home’s, England and a chance to see the evolution of railroading from its genesis. Last week while visiting family, we took a train from Reading to York and had a table with reserved seats, a nice travel. It rained a bit and we made it through the Old York Wall to our hotel. Safe and sound.
The next morning we ventured outside the ancient city wall to visit the National Railway Museum https://www.railwaymuseum.org.uk. Having family not as interested in railroad history, I was curious to see if the museum presented them with the same intrigue it would for me. The museum is free for entry, but they do ask for a £5 donation. Very reasonable compared to other historical sites in the city.
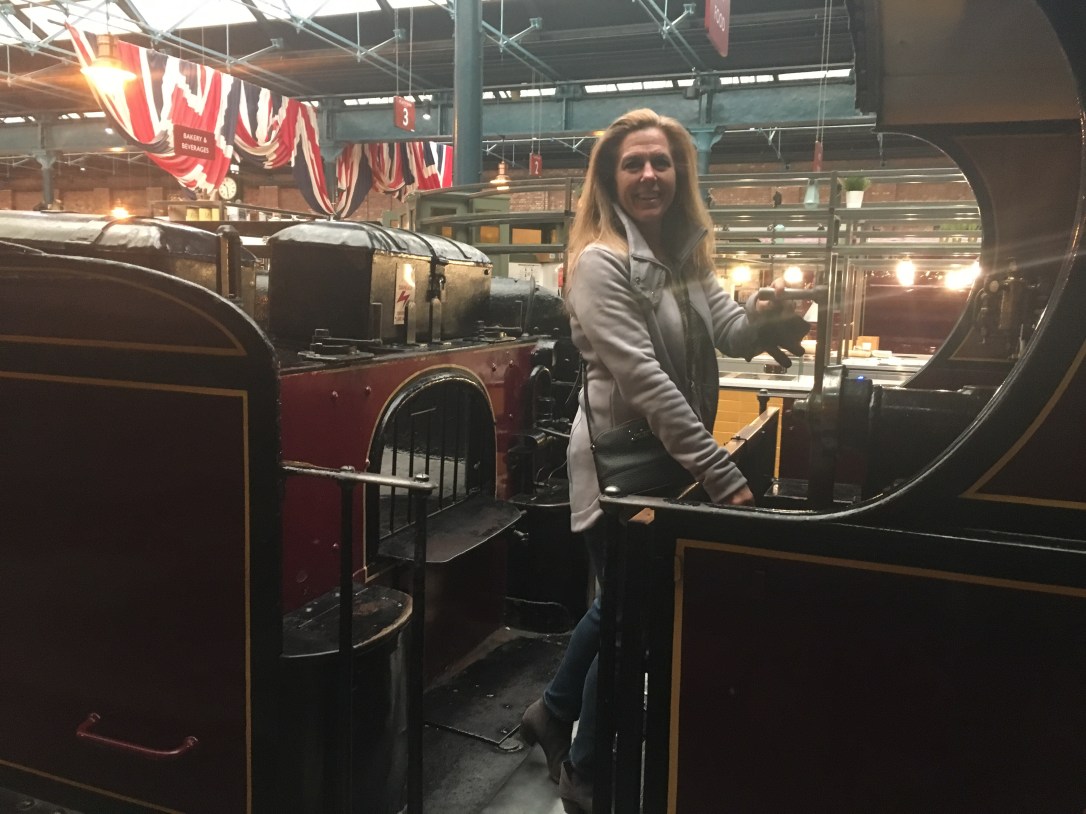
By luck we wondered to the left and first visited the train shed containing the most recent Royal coaches. Well in fact it contained Queen Victoria’s coach and she was the first Royal to travel by train. This part of the museum brought together so many parts of history that everyone was interested. The size of the collection and its level of ongoing preservation is fantastic.
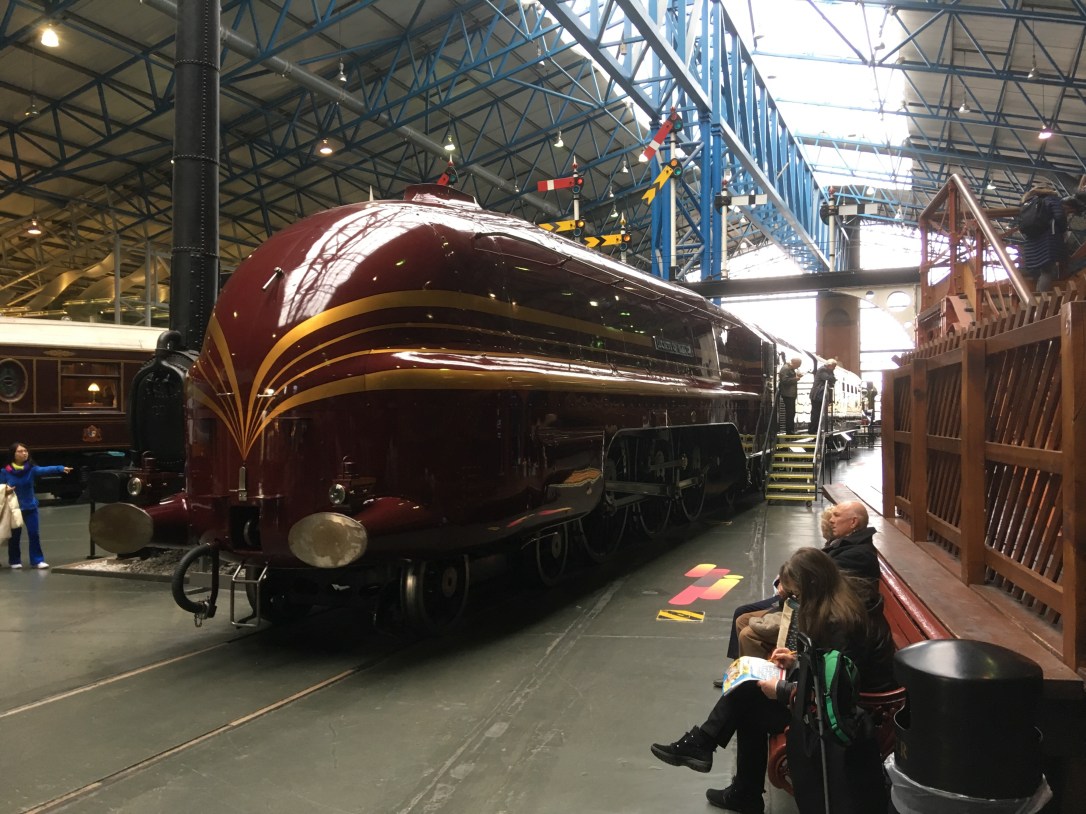
When we entered the larger train shed, the size and scope of the collection was overwhelming. The museums I have visited in America have a well preserved engine or two, but here in front of me where dozens of incredible machines in fantastic condition.
I wasn’t looking at them as objects to try to replicate in scale, I was just seeing magnificent machines from an era when electronics were non-existent. When you think about transportation machines today electronics are a big part of the machine. These are machines that relied on steam or electric power to move them. The electric generator on a steam engine is just an accessory to make the lights shine. My other hobby is working on old British cars and I have an old 1960 Austin Healey 3000. I appreciate its simple electrics and utility. And it is fast. Machines of this age had a few relays and they didn’t have more than the basics to keep electric accessories working. As we welcome autonomous vehicles on our roads, it is a moment for pause to consider how much things have changed.
You know I did not learn anything specific about modeling the B&O or prototype modeling but I had a great time with family. That has led me to consider how to involve my family more in my hobby and on their terms, not mine. And York has many other great thing to offer.
The down side to not having a scale drawing for track design is that things don’t fit as they do on a free hand sketch. Turnouts eat up a lot more space than imagined and transitions have to be more gradual. I took my sketches and started some finer scale drawings, but I found that laying out the track and eyeballing straights and transitions led to better track flow and a more natural look as the trains ran down the line.
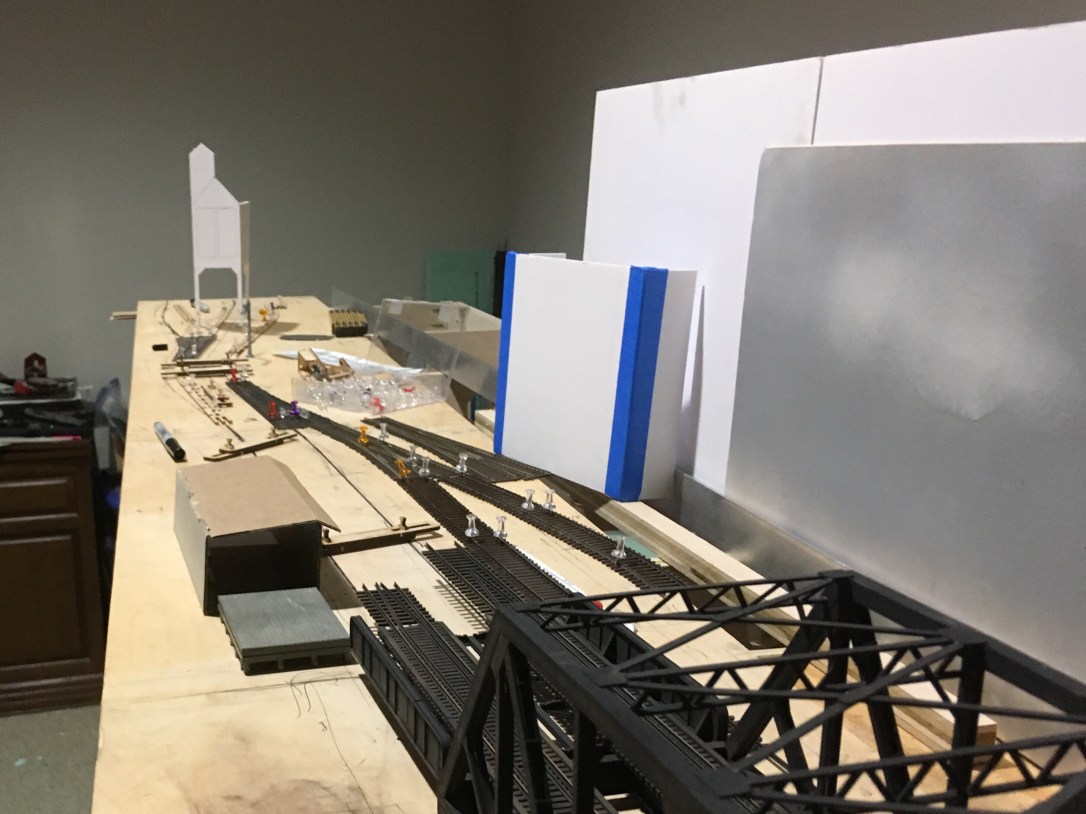
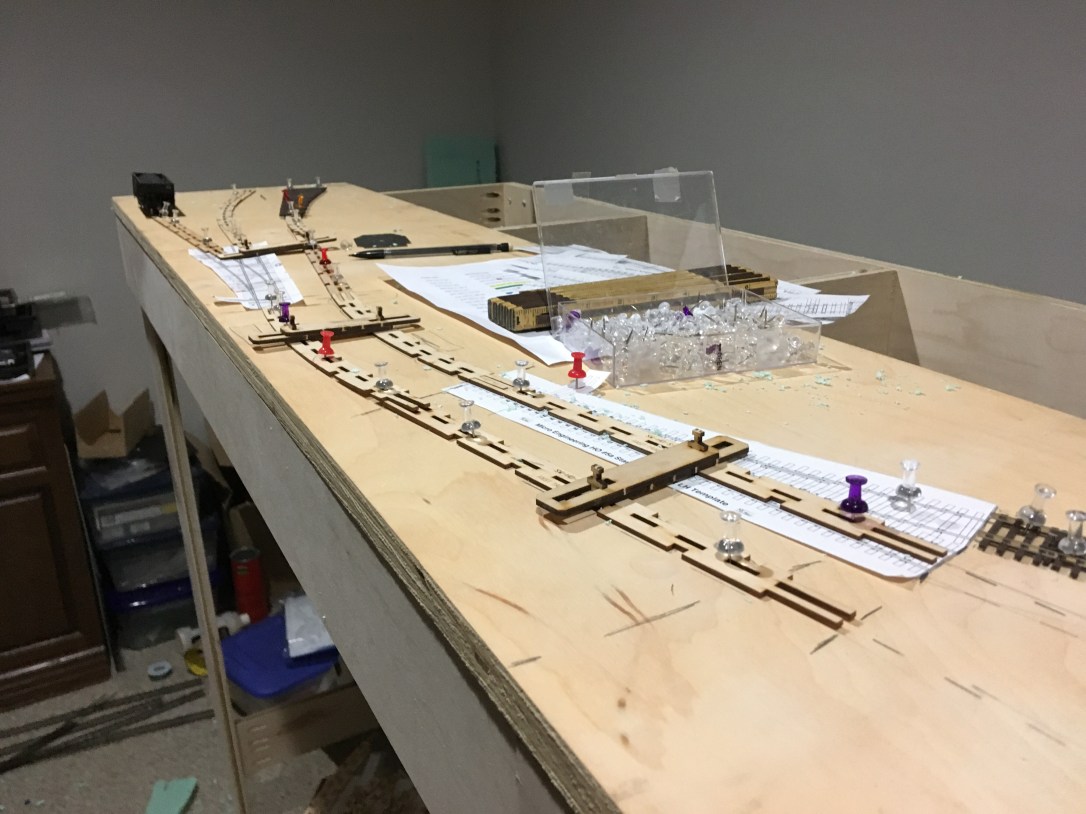
I put a long 8’x 2′ – 3/4″ sheet of birch plywood on my layout structure and started playing with the design. I am using #6 Code 83 Micro Engineering turnouts as much as possible, their weathered Code 83 flex track, and their bridge track. I bought several turnouts and also printed templates from their website to assist in the exercise.
Some Fast Tracks Sweep Sticks in various radii (with 2 1/4″ center radii differences), push pins, and some mock-ups of major structures helped me see the potential and make decisions about distances. Things got compressed more than desired and some things had to be left out. But I needed to visualize the layout in full size with a backdrop, turnouts, freight cars, and locomotives to feel comfortablewith my decisions.
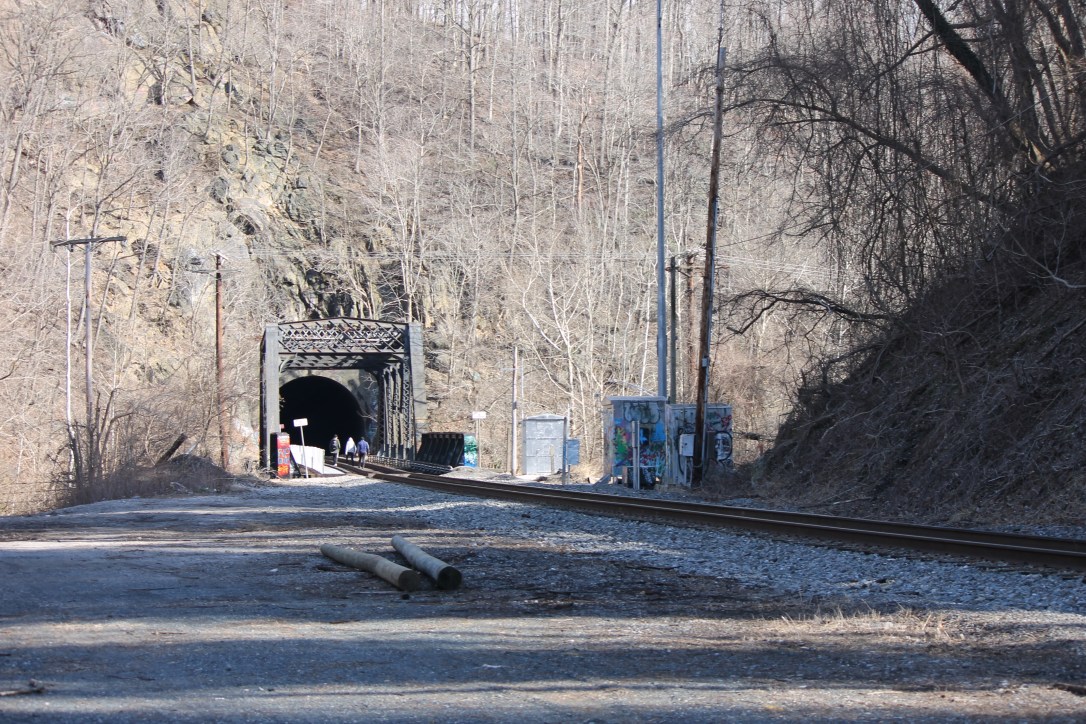
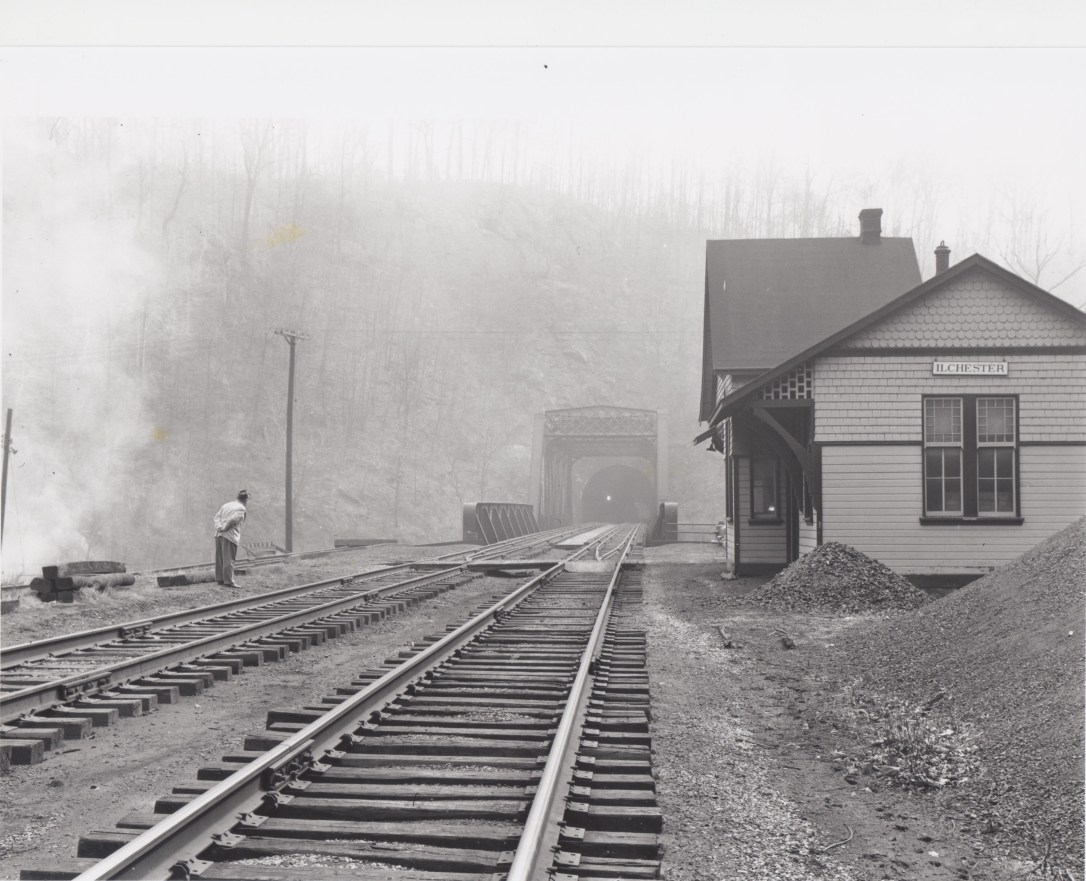
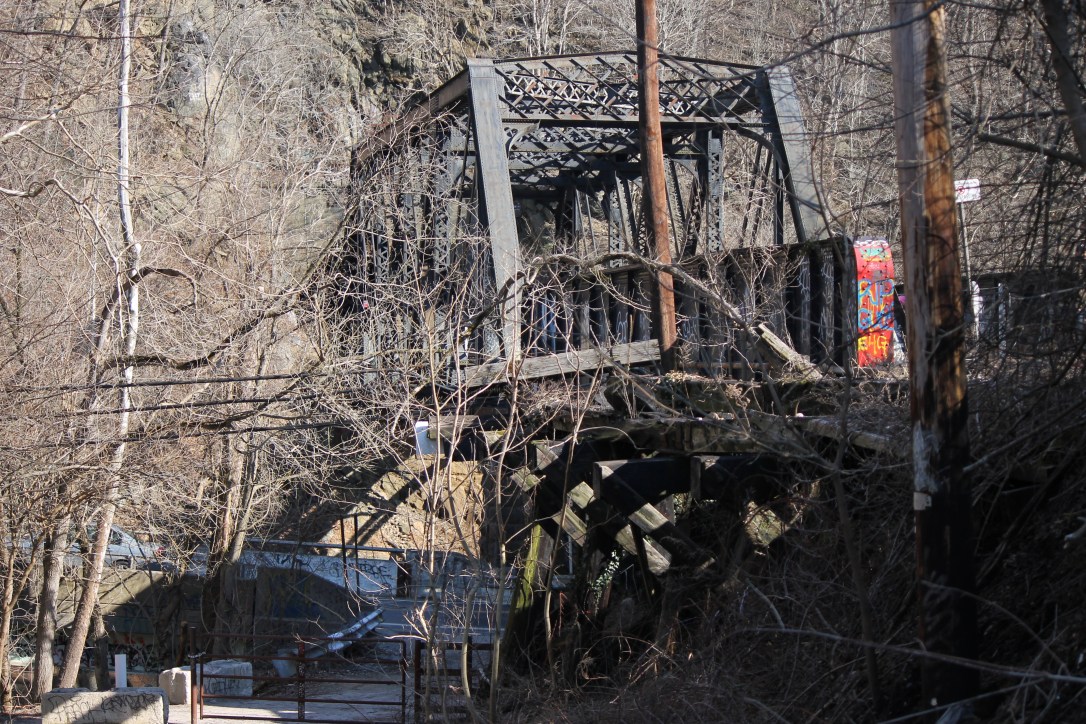
A signature feature of Ilchester is the two bridges that cross the Patapsco River and Ilchester Road just as the roadbed emerges from a tunnel. The line used to follow the river, but a realignment changed that with the addition of the tunnel in 1903. The quick mock up of a concrete coaling tower is the center point for the next location after Ilchester, known as Lees. The tower was added during WWII to help through trains avoid congestion in Baltimore as they headed further east on the B&O. (More on that later.)
Ilchester Bridge and Remnants of a Coal Trestle, 2018, Bruce D. Griffin Photo
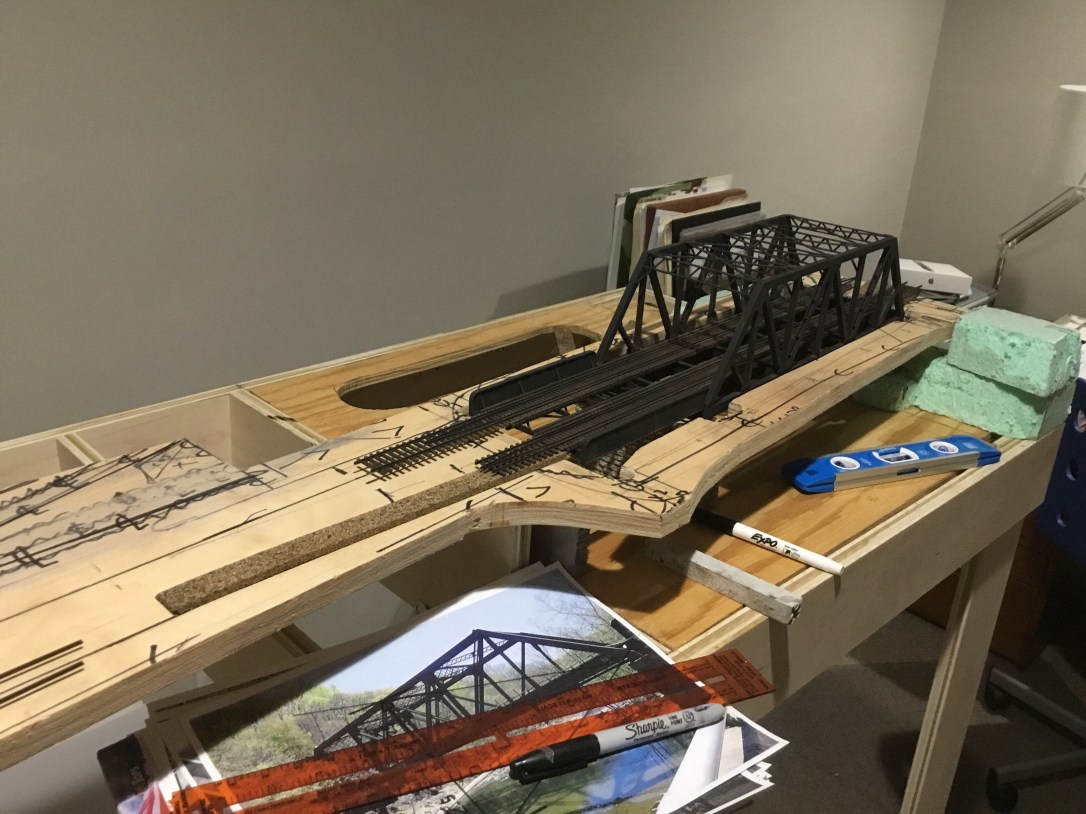
The next step was to use the Cookie-Cutter method and trim down the large 1/4 sheet of plywood to just follow the roadbed. For the bridge area, I tried something unusual to make sure I had the right height on both sides of the bridge. I cut a hole in the plywood to fit the bridge and left small supports on either side to make sure the two sides of the gap were in perfect alignment. The track was already glued to the bridge with Pliobond. I fastened the subroadbed to the risers before fully cutting the subroadbed in two.
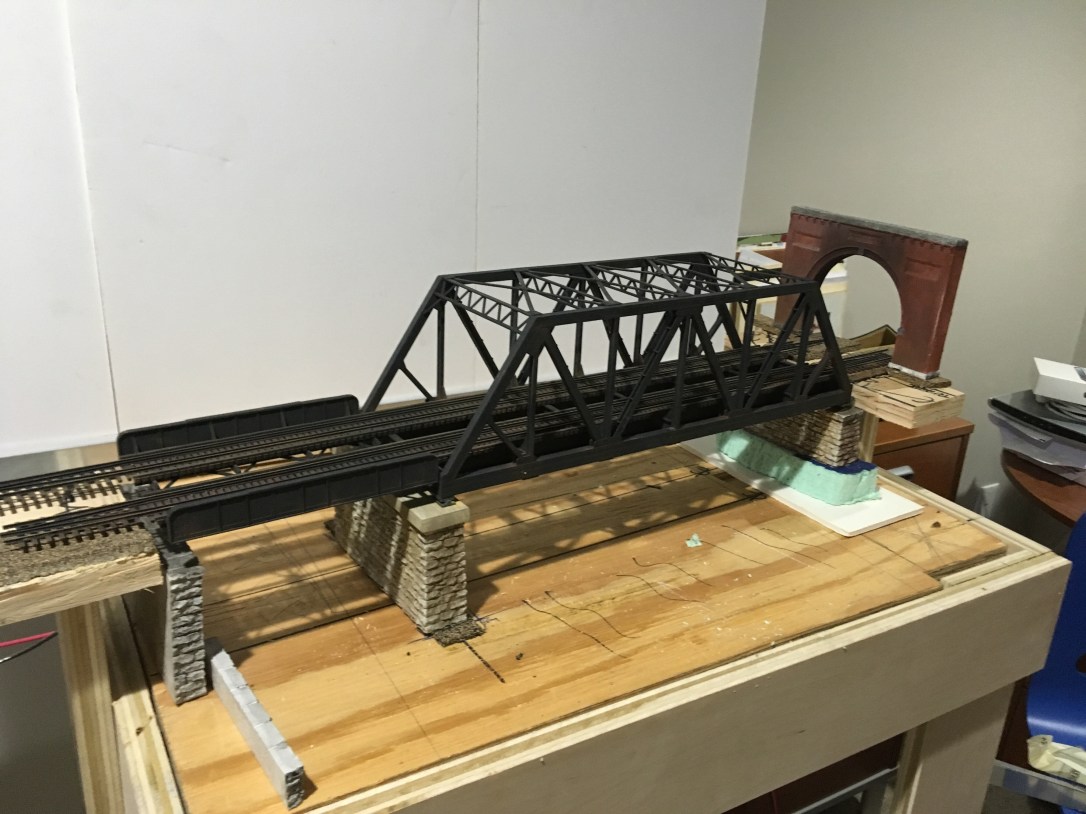
The bridge alignment was a big unknown for me, thus the measures to keep the plywood subroadbed whole before fastening it to the risers. It worked out well and the only thing left was to shim up the supports and add feet for the smaller bridge. The odd shapes of the support columns and the extreme gap for the through girder bridge actually mirror the prototype.
The next operation is to start adding some cork roadbed and track. Let me thanks the many members of the Proto-Layouts@groups.io https://groups.io/g/Proto-Layouts for their insights into the next steps.
I have a sketch of the trackplan beyond the first two modules, but I want to get track halfway through the second module before I start to finalize the design. The Tunnel Portal (a commercial casting that follows the B&O plans for this era portal) leads east to Baltimore and will eventually be moved against the wall leading into the unfinished basement and staging. I may add a temporary track to allow me to run one train in each direction and try operations.
My “final” sketch for the overall layout before starting the first three modules. September 2018.
I have a small space in a finished basement, so I have restrictions. It shares space with the family desk so this must be accessible to all in the house. This eliminates the possibility of a shelf style layout that could form a loop and allow for continuous running. Continuous running is something I want from a layout. Although not as popular, I am more of railfan modeler, I want to see my models running by in prototypical scenery. I guess it goes back to the “Train Garden” layouts I visited at Christmas time in my earliest years. Operations do not entertain me as much. I built a switching layout a few years ago, it just didn’t do it for me.
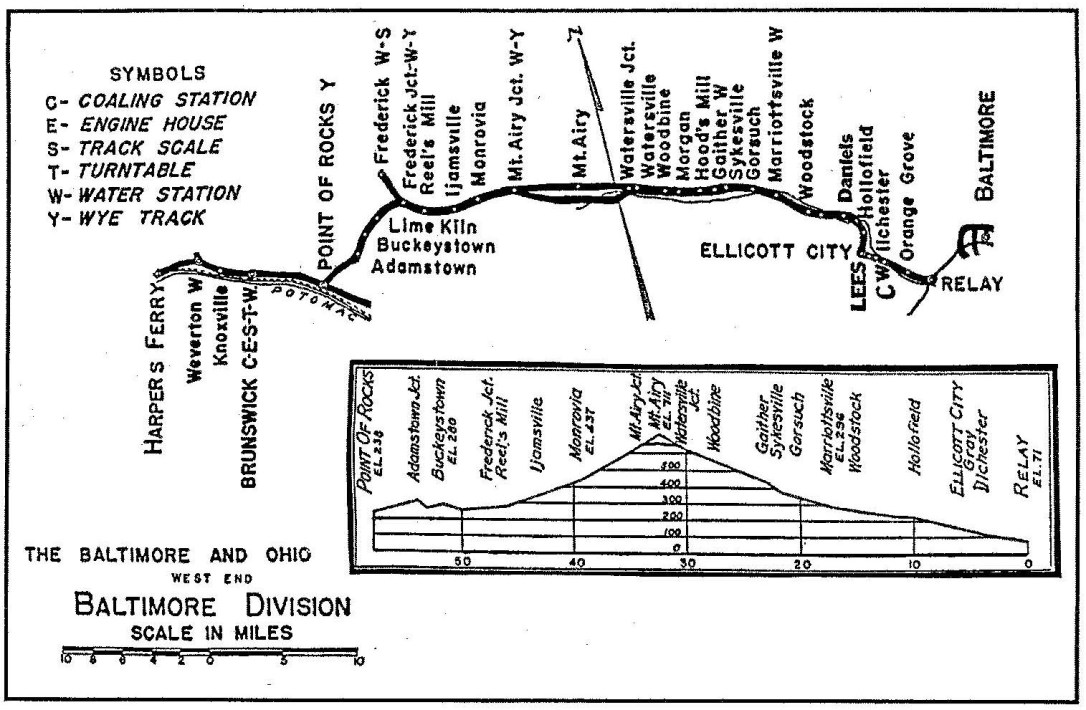
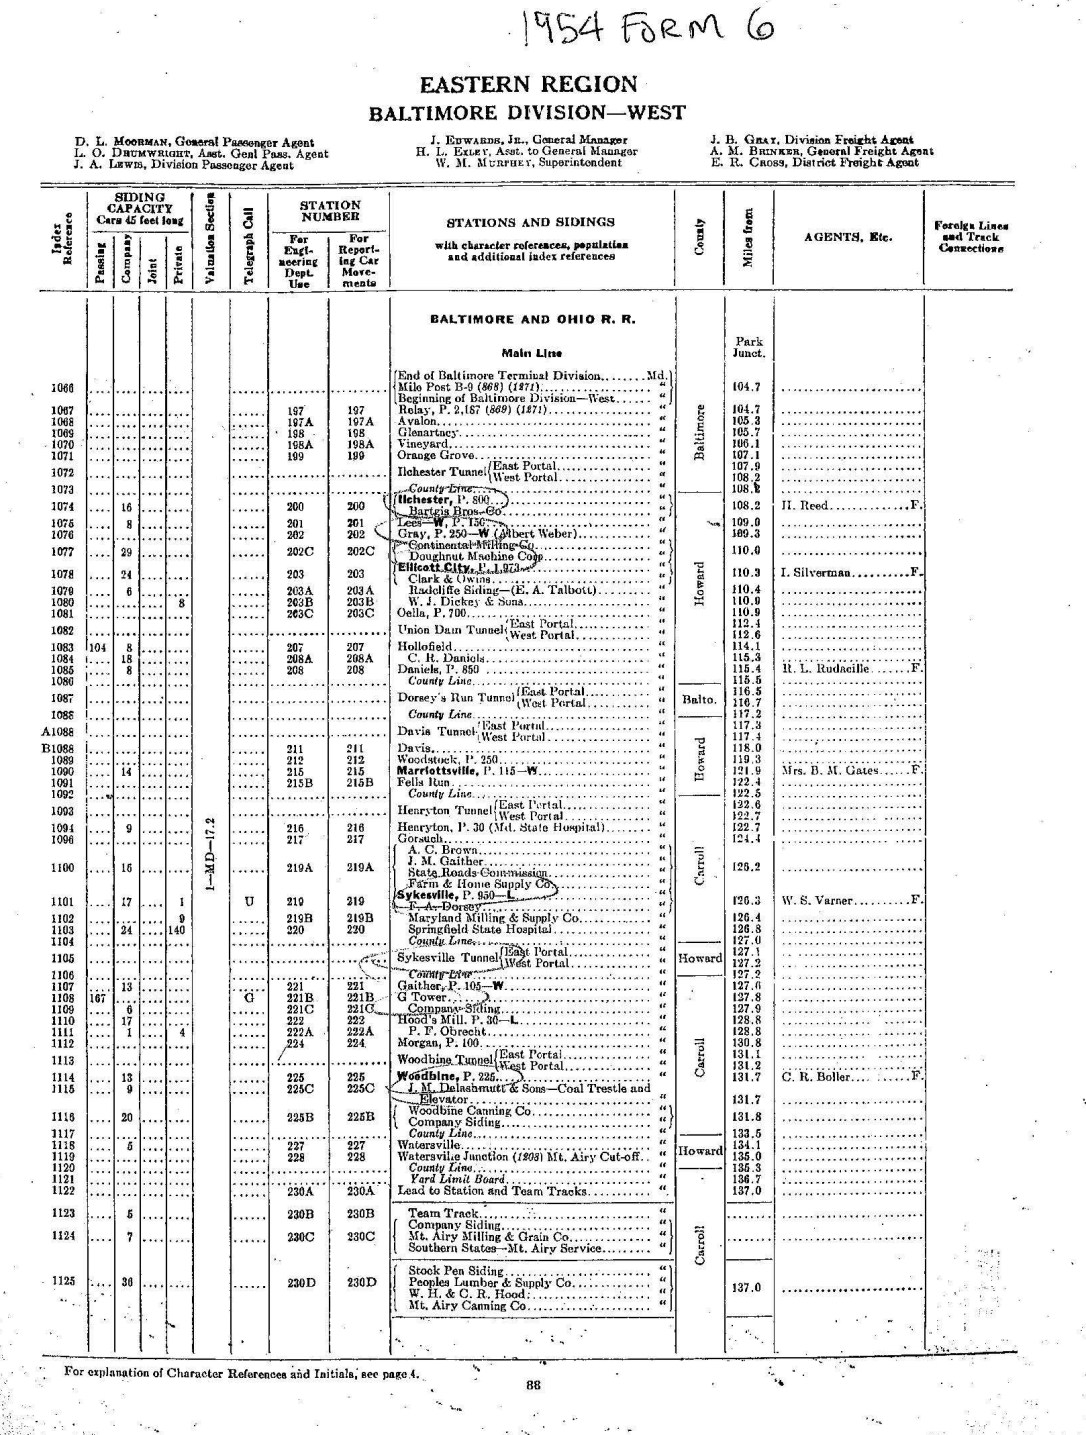
The prototype I chose to model, the B&O’s Old Main Line (OML) was more of a through route by end of WWII, it still had some customers and a way freight that went from Baltimore to Brunswick one day and back the next; operating six days a week. The 1951 or 1952 version of this local was chronicled in the January/February 1992 issue of the BORRHS The Sentinel magazine. The photos and the story are my primary source and will allow me to do a little operating (as conventional wisdom suggests is the way to get maximum enjoyment) while being able to run through freights. Passenger Service ended on the OML in 1949, so I am foregoing that operating and train watching opportunity by focusing on a summer day in 1950 or 1951.
The Old Main Line in 19521954 B&O Form 6 for the eastern portion of the Old Main Line
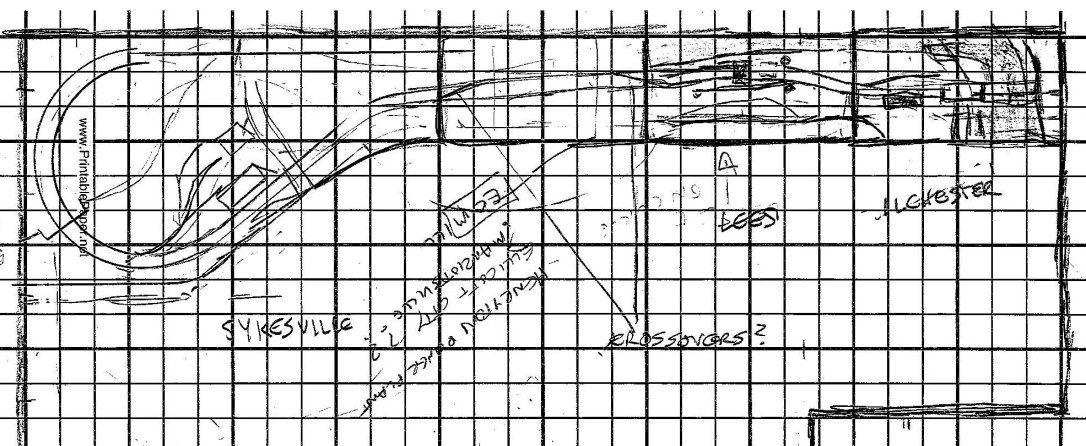
As stated in an earlier blog post, a location I have researched and wanted to model is Ilchester, MD. The OML comes through a tunnel from Baltimore and immediately crosses the Patapsco River. This was always envisioned to be one end of the visible layout, shown in the right of the layout sketch below.
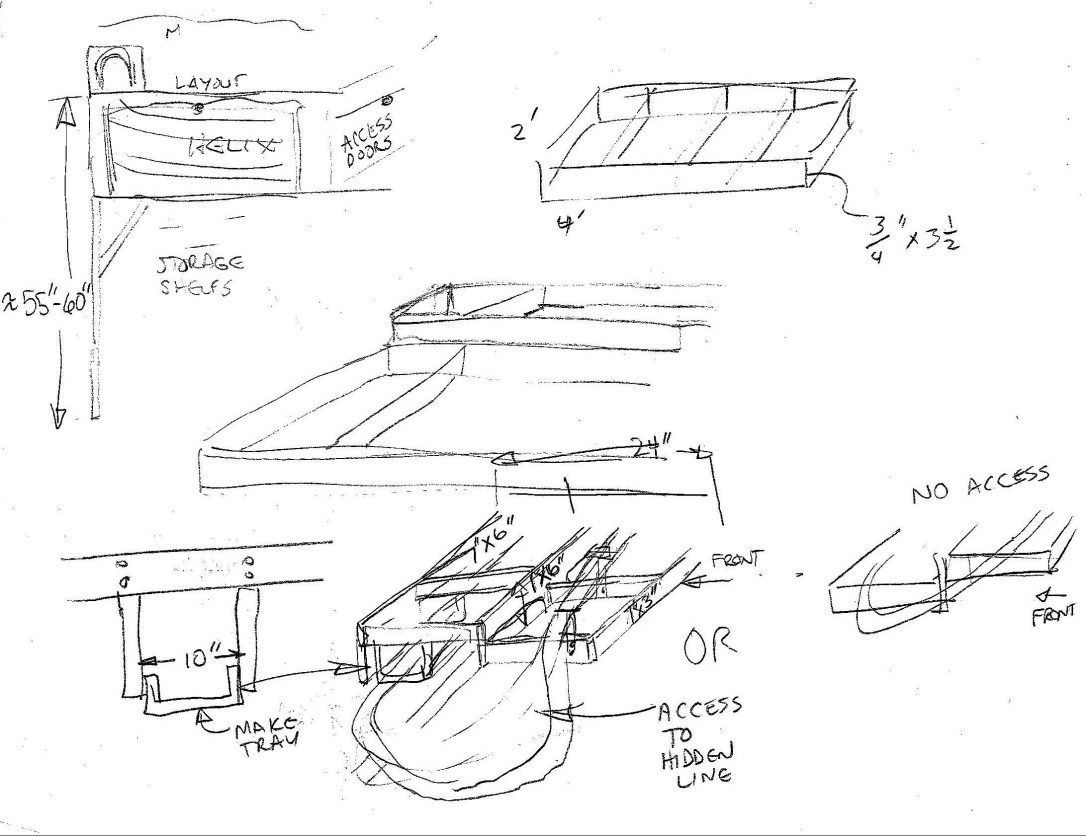
My initial thought was to use the full width of the 2’x 4′ modules for the mainline to run once through the scene on a shelf layout with the a helix or some arrangement at one end to return the trains back to staging out of sight on the right.
This led to a lot thought about how to get the return track back to staging. The staging would have to have the same type of return loop, be it a helix or steeply graded 180 degree return curve. No great inspiration struck me and I kept coming back to things that have already been designed and those led to too many compromises or too much cost for me to consider. I also realized that most of ideas would have have my models running out of sight more than in view, so that didn’t make sense for someone who wanted to watch trains.
Some of the sketches above were an attempt to build a support structure to have the hidden return line only be a few inches below the front visible line to remove the need for a helix. As the two foot module width available for visible scenery was being reduced to 18″ to accommodate the hidden return track, I realized it might be easier just to make the return track visible with some simple scenery elements. That led to my “final” sketch below.
My “final” sketch for the overall layout before starting the first three modules. September 2018.
I moved the shelf layout a few feet from the wall and decided the former hidden mainline could represent a relatively straight section of track west of Gaither, MD. There will be a similar return loop on the right side in the unfinished portion of the basement beyond the finished wall. It will incorporate staging to support through freights that will run both ways and a way to reverse trains to support the local freight that heads west one day and back east the next.
This will get me started, I should have enough lumber build the first three 2’x 4′ modules on the right. This will give me a chance to develop techniques for track and scenery, build some structures, and run some trains. If I revise my vision for the rest of the layout, I still have lots of flexibility. These modules could become a peninsula for a larger layout that is primarily a shelf layout taking up more of the living space. It could be a point to point or pushed against the wall if I don’t progress to building the return loop. Time will tell.