If you follow the progress of my layout, you know I am starting at the railroad east end and working my way west. Laying track to serve the town of Ilchester, MD requires special infrastructure, including a coal dump, two bridges and a tunnel. That’s what we will cover in this post.
The Coal Dump
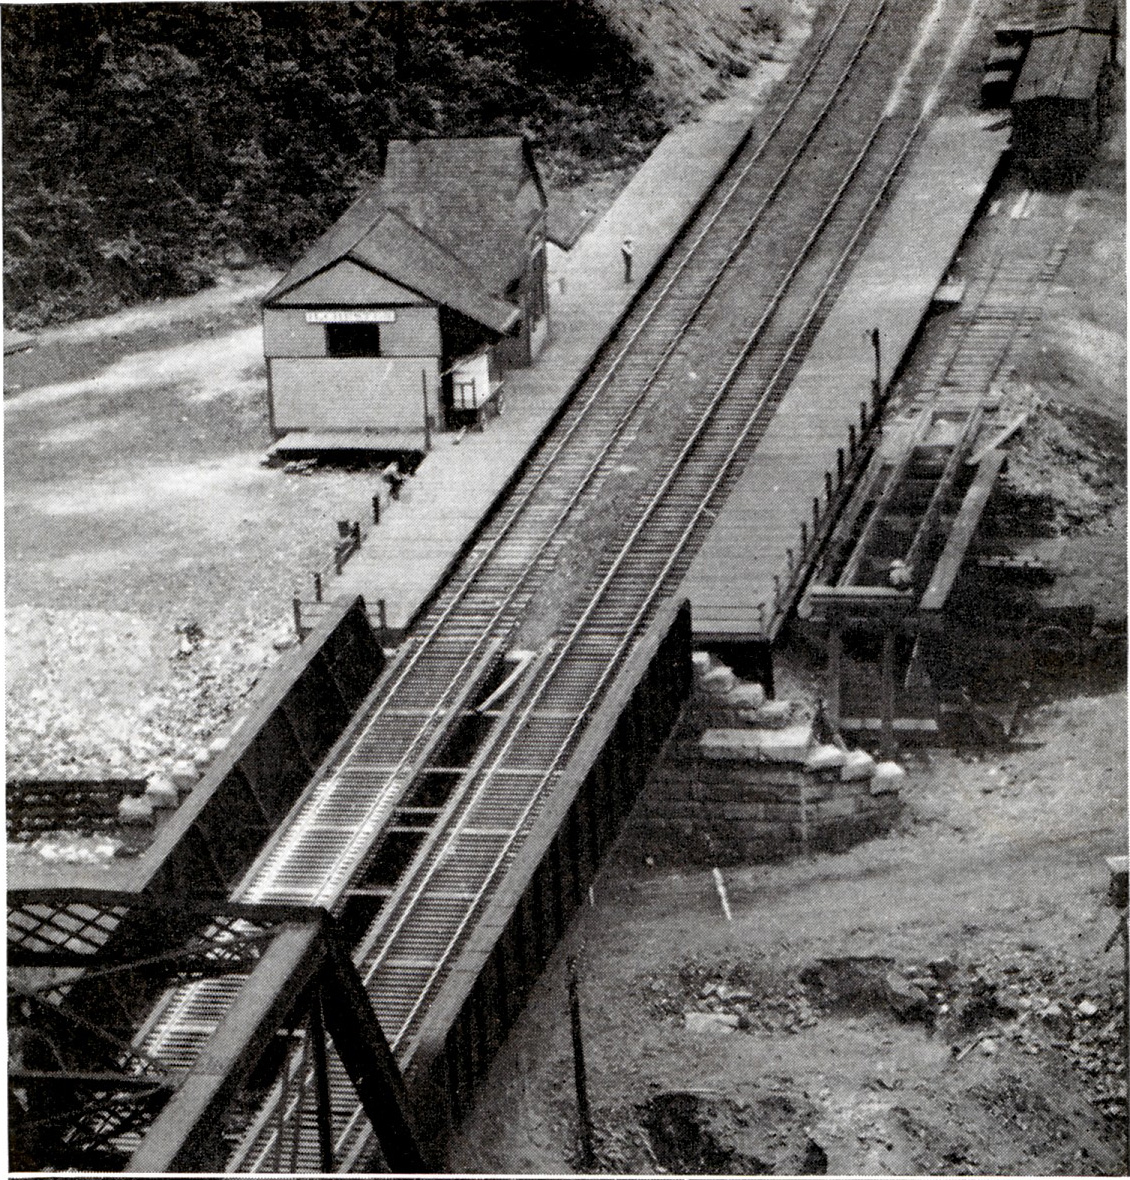
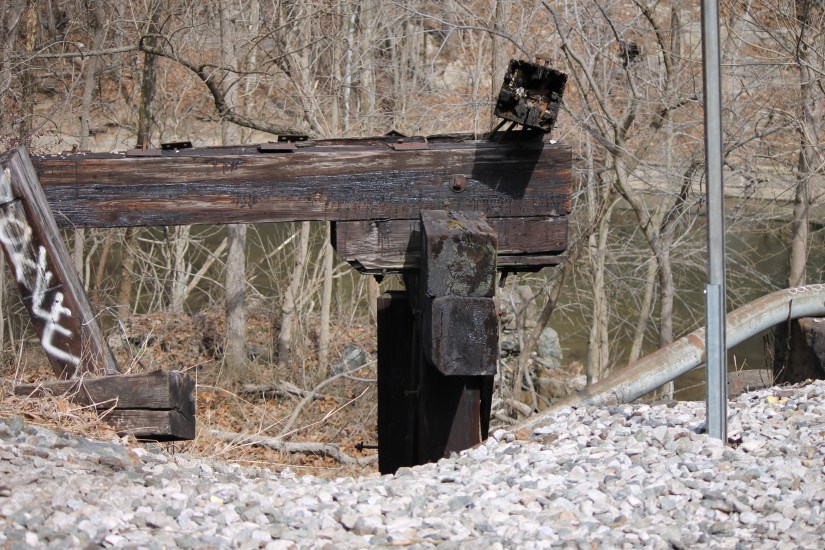
This structure appears in the earliest photos of Ilchester after the realignment in the first part of the 20th century. Maybe it was meant for residential delivery when it was first built in the early 1900’s. Coal was used to heat homes and was a common fuel during that period. I wonder if gas stations will seem as unusual to modelers in the beginning of the next century? The early photos of Ilchester Station show long wooden passenger platforms, maybe this was a planned commuter station initially. Remnants of the coal dump are still on the site in 2018 and it might have been part of the original 1904 realignment or built just thereafter as it was in place in the 1920s. It appears to follow the B&O 1907 Standard Building Plans for a Commercial Coal Dump. I have a copy of those drawings contained in a document obtained from the B&ORRHS Company Store. https://borhs.org/shopping/index.html
Tipple, Trestle, or Dump? In my B&O home growing up, what was termed as a Commercial Coal Dump in 1907 by the B&O was called a coal tipple. The term tipple is often used at or near a mine head for a trestle that is used to transfer coal from a mine cart or truck to another means of conveyance. I have also heard the term coal trestle used. I am going to use the term coal dump.
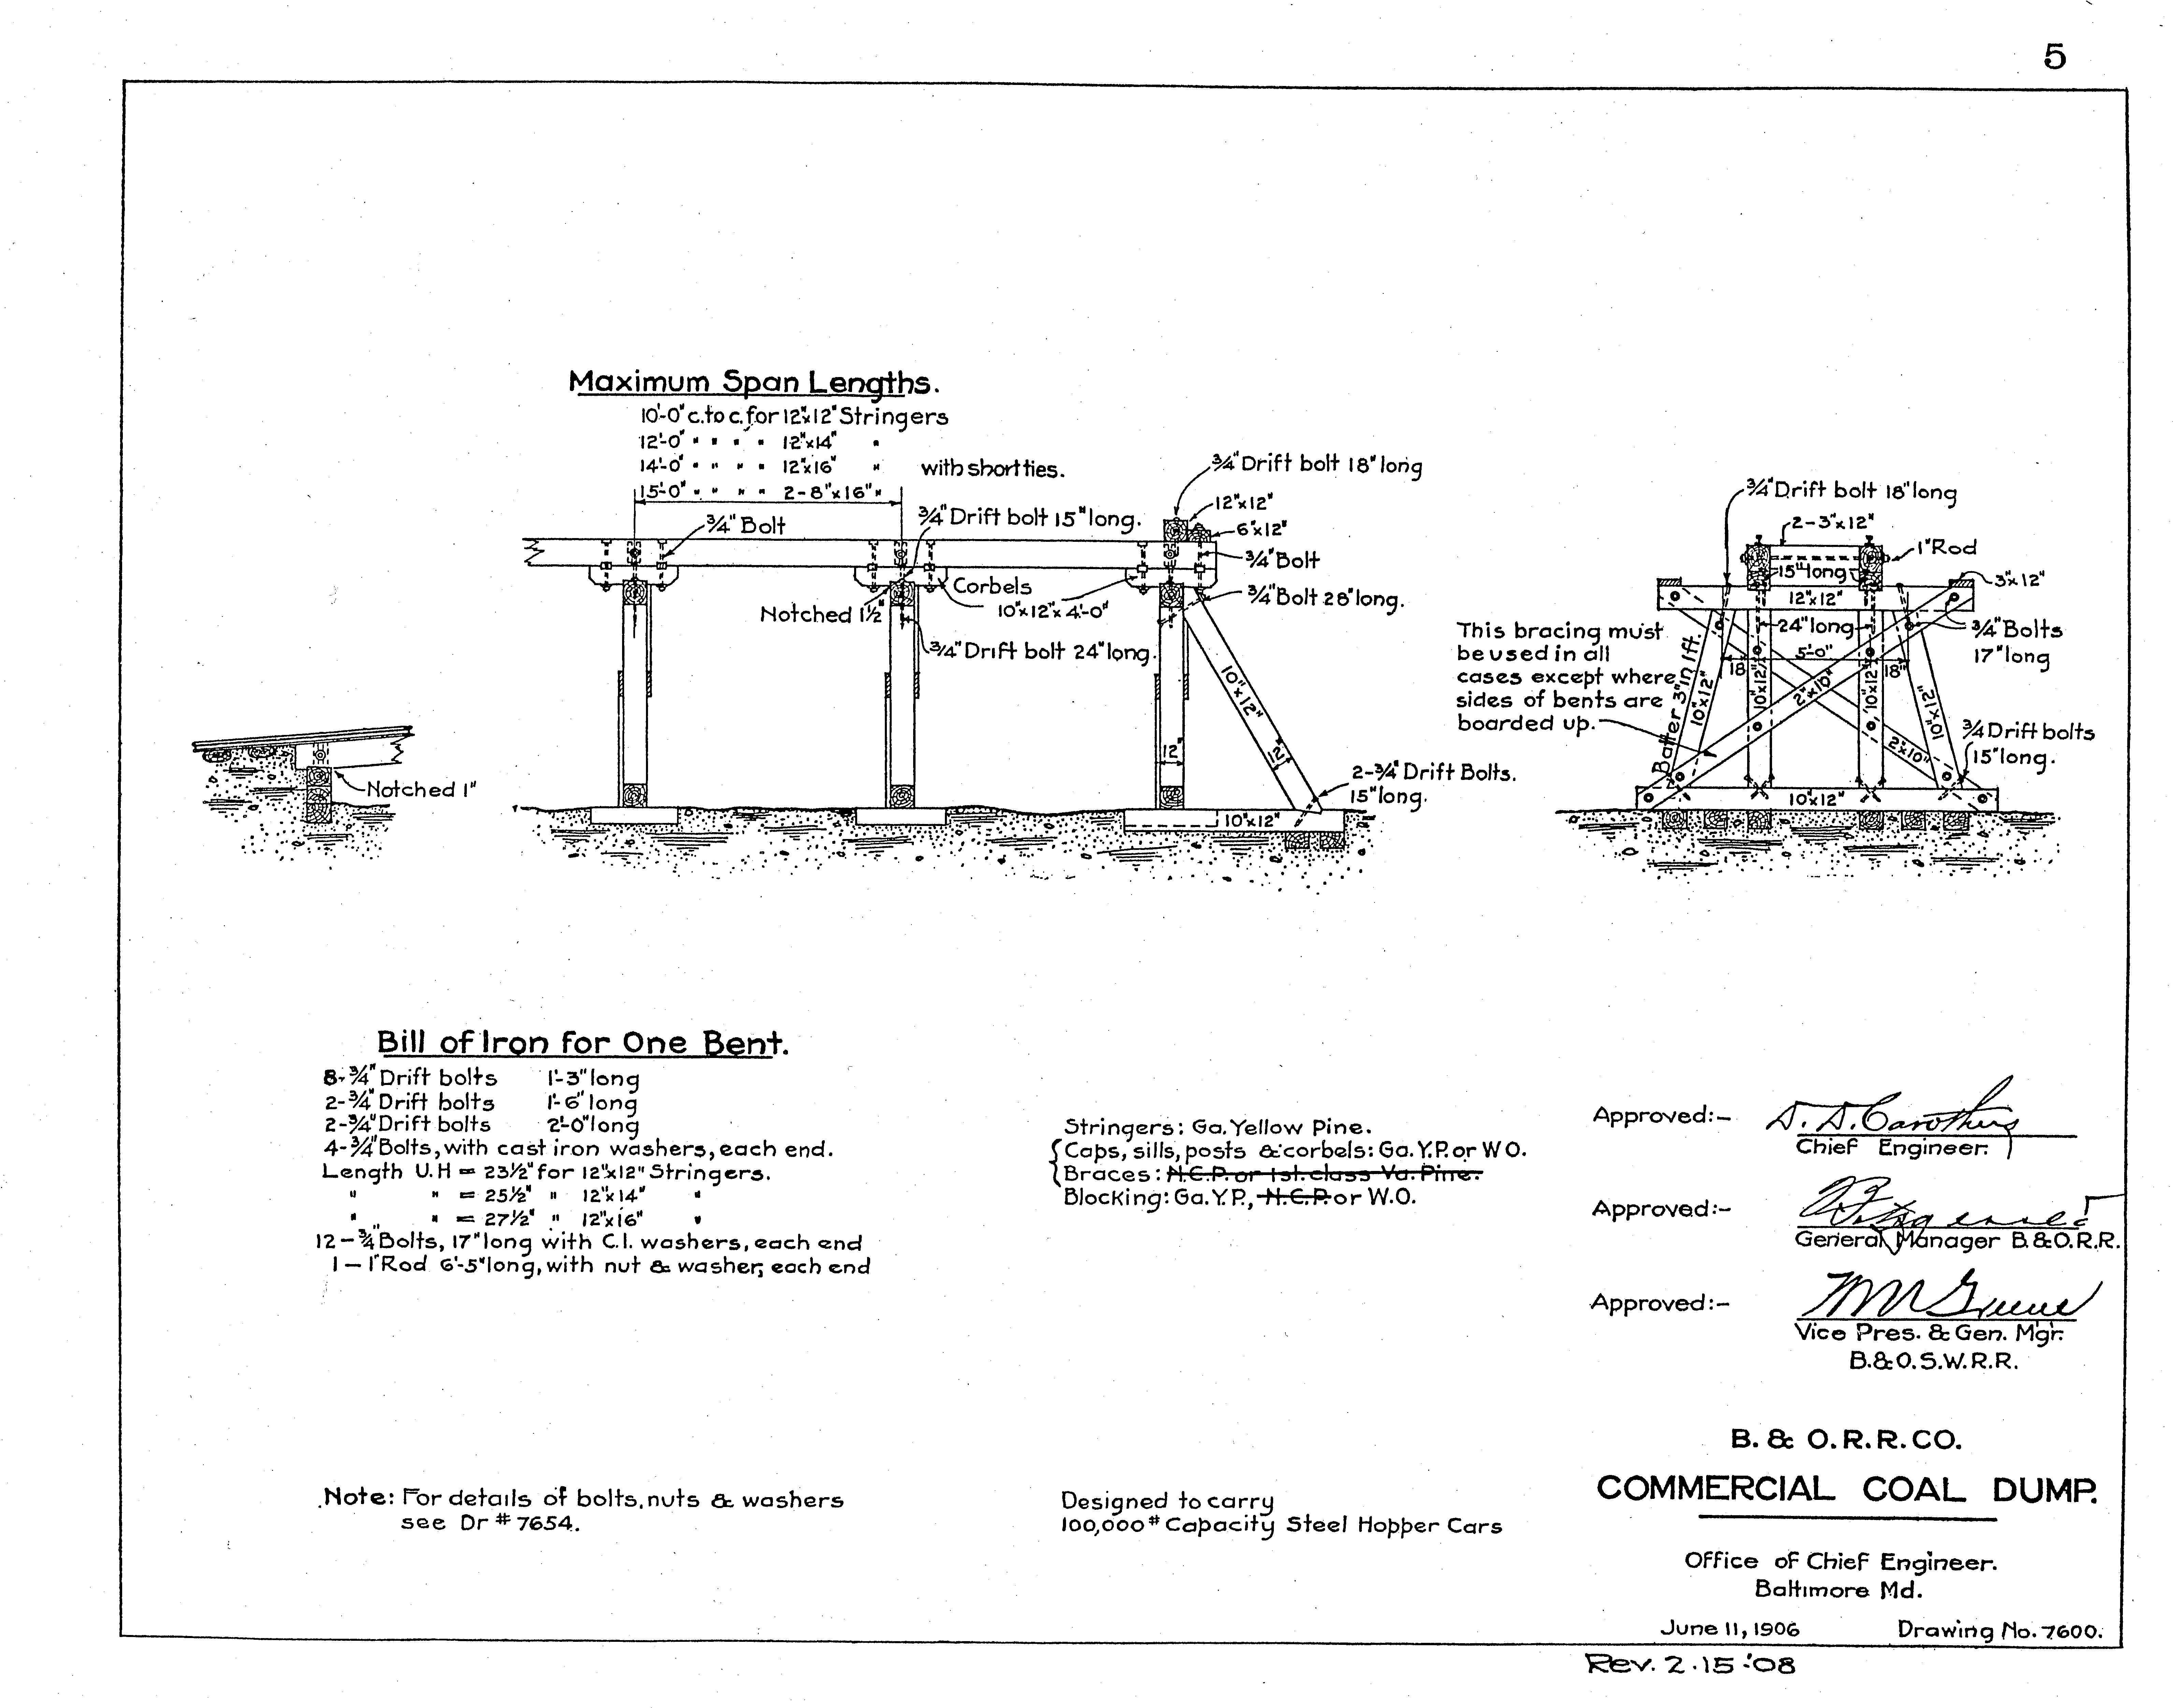
Building an HO scale model of the coal dump was a matter of purchasing styrene stock shapes to match the plans and adapting tried and true methods of wood model bridge construction to styrene. I chose styrene over wood for several reasons. The first was my comfort with accurately cutting and joining styrene, I like the precision it affords. I also wanted dimensional stability. And finally it has the same look and texture as the other modeled “wood” for the ties and especially the large number of bridge ties in the modeling scene. I used Evergreen products: including #8612, HO Scale 6×12; #8212, HO Scale 2×12; #8412 HO Scale 4×12; and #8410 HO Scale 4×10. I glued various sizes together to get needed lumber sizes, for example I glued two 6×12 pieces together to get needed 12×12 for the main supports.
I reduced the plans in HO scale with a photocopier to aid in taking scale measurements, using the rail width as a known distance. Having them to scale helped me check my first bents and then I figured out a simple jig to construct multiples. I only need one, but am building three more for my friend Don Barnes for his layout. If the jig survives, I am happy to lend it to anyone wanted to duplicate this structure. Drop me an email.


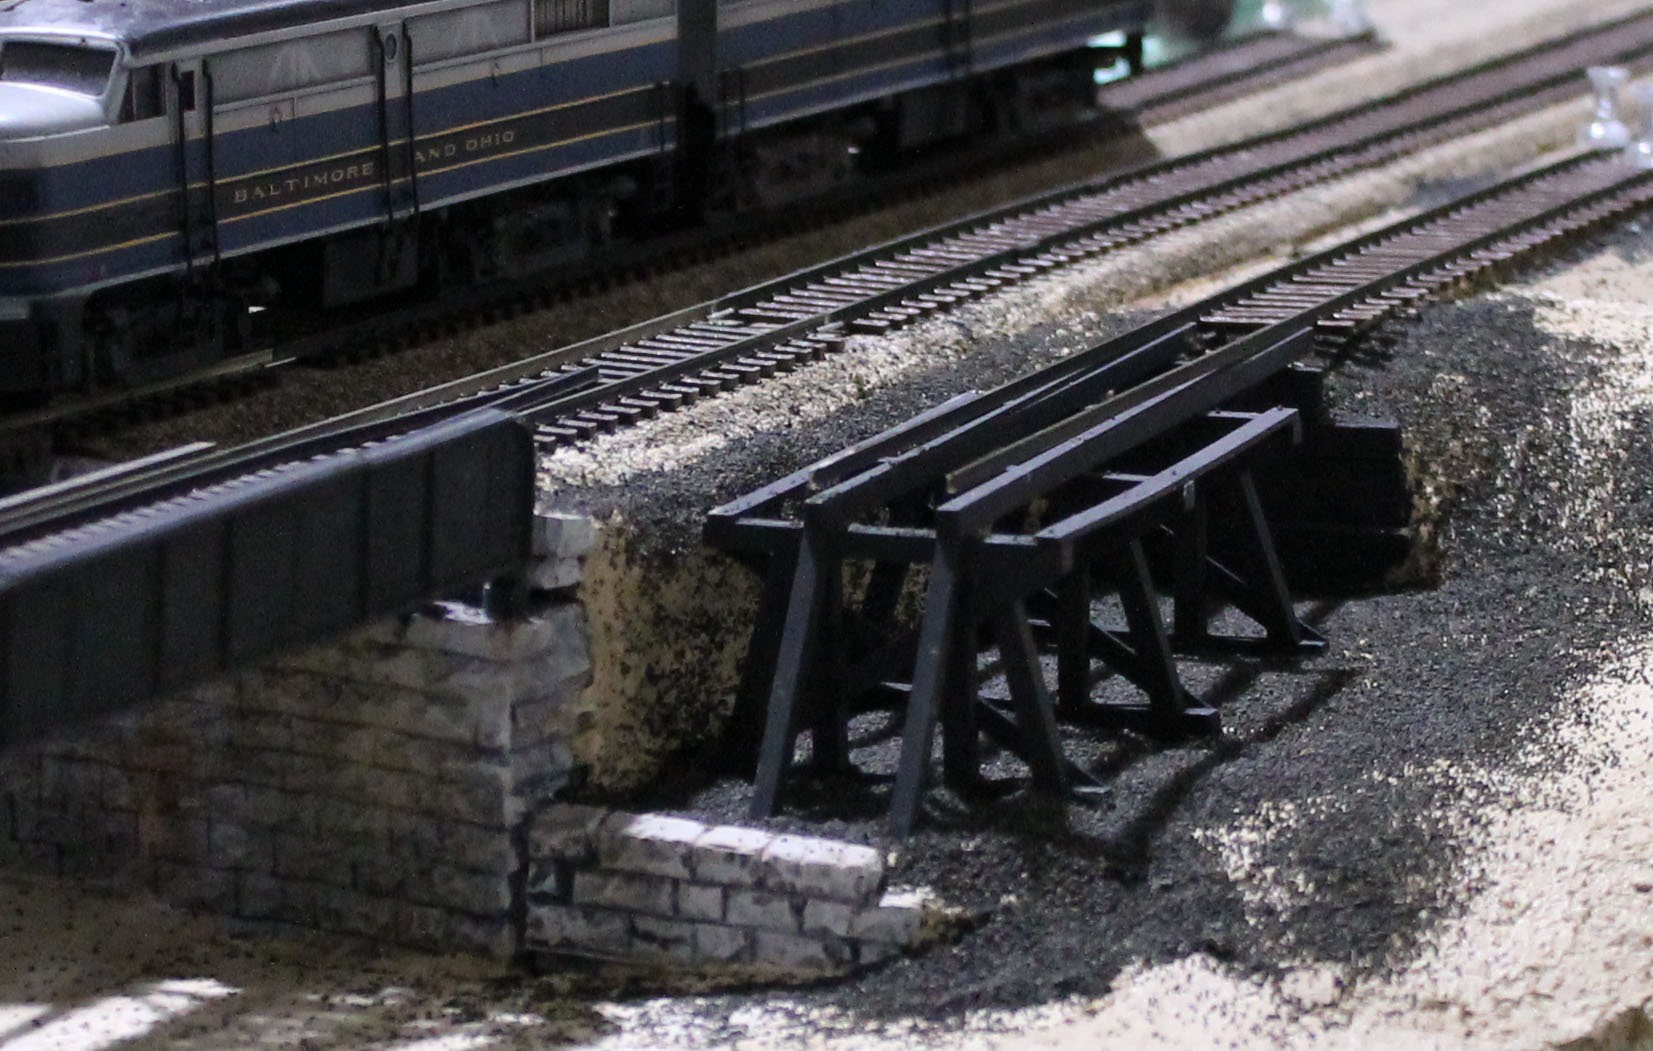
I sought insight into the best way to build a jig for a plastic bent, but it seems most people use wood. After some internal debate I decided to keep it simple and use materials on hand. I had a small piece of flat aluminum and some square brass stock from another jig. Expecting a short life for the jig, I combined dissimilar materials and used 5 minute epoxy to join them. I used a NWSL Chopper II to duplicate structural members and glued them together in the jig. The Plastruct Bondene solvent melts the plastic to form a joint and some of it leaked under the joints and lightly attached the bent to the aluminum. After the glue started to set and melt the plastic, I lifted it a few milimeters and let it cure. That allowed it to release easy enough.
Stringers under the rails tie the structure together. I glued the bents to a thin piece of styrene sheet and positioned it on the layout using scenery goop to set it at rail height. The styrene sheet was painted black with a light highlight spray of brown like the rest of the structure and covered with coal and coal dust to make it blend into the scene. As the trestle structure is mostly hidden, I also finished it in black paint with a rail brown overspray for highlights and to simulate the heavy creosote on such structures. Tichy nut, washer, and bolt castings were added to the visible ends and the top to finish the model.


The Bridges and Tunnel
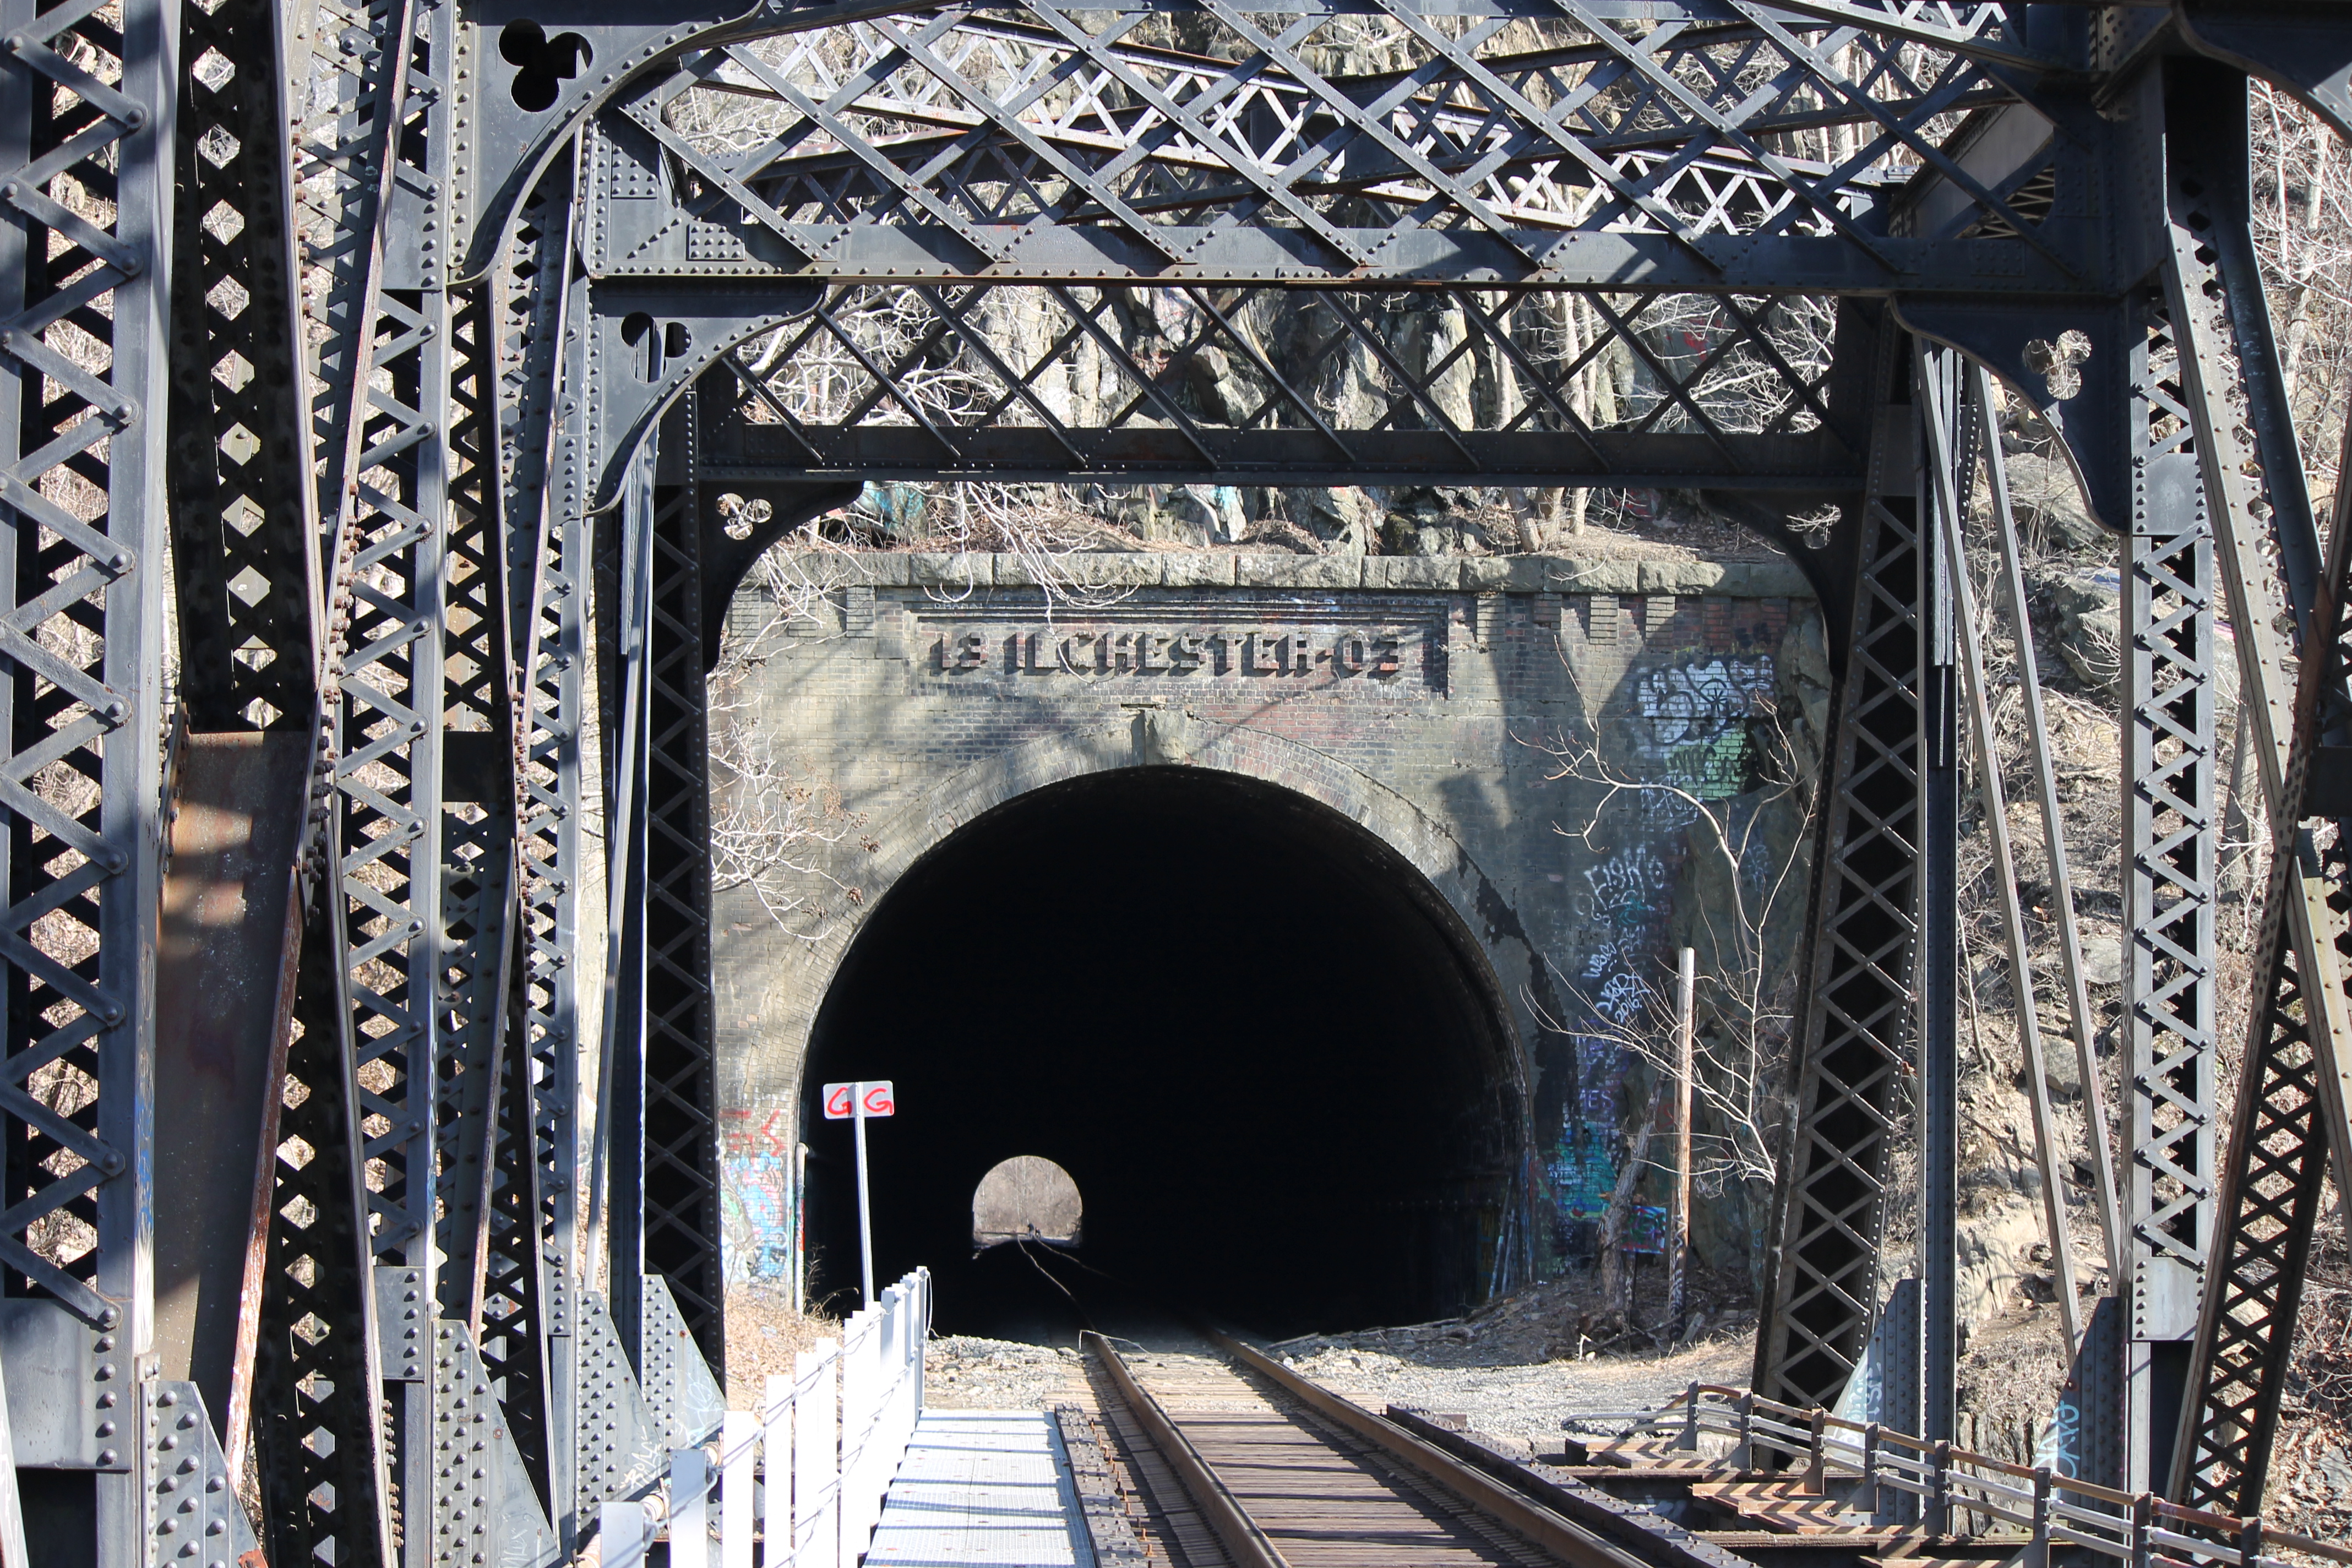
The Bridges offered me several modeling possibilities. The double-track Pratt Truss pin-connected prototype bridge has actually been offered as an excellent brass HO and N scale model. Train Cat Models offers the brass kit, http://www.traincat2.com/d_ilchester.htm but the $549.95 price tag and the prototype length led me down a different path. Walthers and Central Valley both offer suitable stand-ins.
I chose to construct both bridges from Walther’s kits. I didn’t have immediate access to the Central Valley kits and I found one of the Walther’s kits on EBay very cheap. I used the Walthers HO 933-2948 Through Plate Girder Bridge Kit and the Walthers HO 933-3012 Double Track Truss Bridge Kit. The Through Plate Girder Bridge kit was modified by removing the center girder and replacing it with a styrene strip to keep the bridge width the same as the longer span. The prototype only has two girders so this is a way to simulate the look. The girders aren’t tall enough to match the prototype, but it looks good. The Truss Bridge Kit was built according to the instructions. Both were airbrushed with Vallejo NATO Black during construction to make sure all of the nooks and crannies got painted. I weathered the structures with pastels and Bragdon powders.

The track is Micro Engineering Code 83 Bridge Track. I painted the rails and ties Vallejo NATO Black and then weathered them with dark brown and rust pastels. The end result is a nice dark shade of rail brown. I wanted the bridge ties to look different as they do not age like ties in contact with the ground and are specialty products designed for bridge construction.
My extensive use of Vallejo paint and my new Iwata dual-action, gravity-feed airbrush on this basic painting project have given me a lot of valuable airbrushing experience that I will use on new freight car projects. Airbrushing was never a skill I was comfortable with, but using Vallejo paints with their easy thinning and clean-up gave me the chance to practice my skills. I am currently experimenting with a variety of colors from the Vallejo line to see where they can be used on other projects. One accessory I purchased to make airbrushing more enjoyable was the Iwata-Medea Universal Spray Out Pot. It makes color change and clean-up so much easier. Find a video on how to use one and give it a try!
The three bridge piers and abutments were made from two Walthers parts, HO 933-4584 Double-Track Railroad Bridge Stone Abutment, Resin Casting, and HO 933-4582 Double-Track Railroad Bridge Stone Pier, Resin Casting. The Stone Pier was cut into two pieces with the shorter top half used as an abutment on the tunnel side of the bridge. The taller left over piece was used for the middle pier. It needed a unique concrete top that I created with some pieces of sheet styrene. I painted the styrene a concrete color and weathered it along with all the other stone surfaces with a wash of thinned black acrylic hobby paint, pastels, and Brogdon powders. Prototype photos helped me choose appropriate colors.
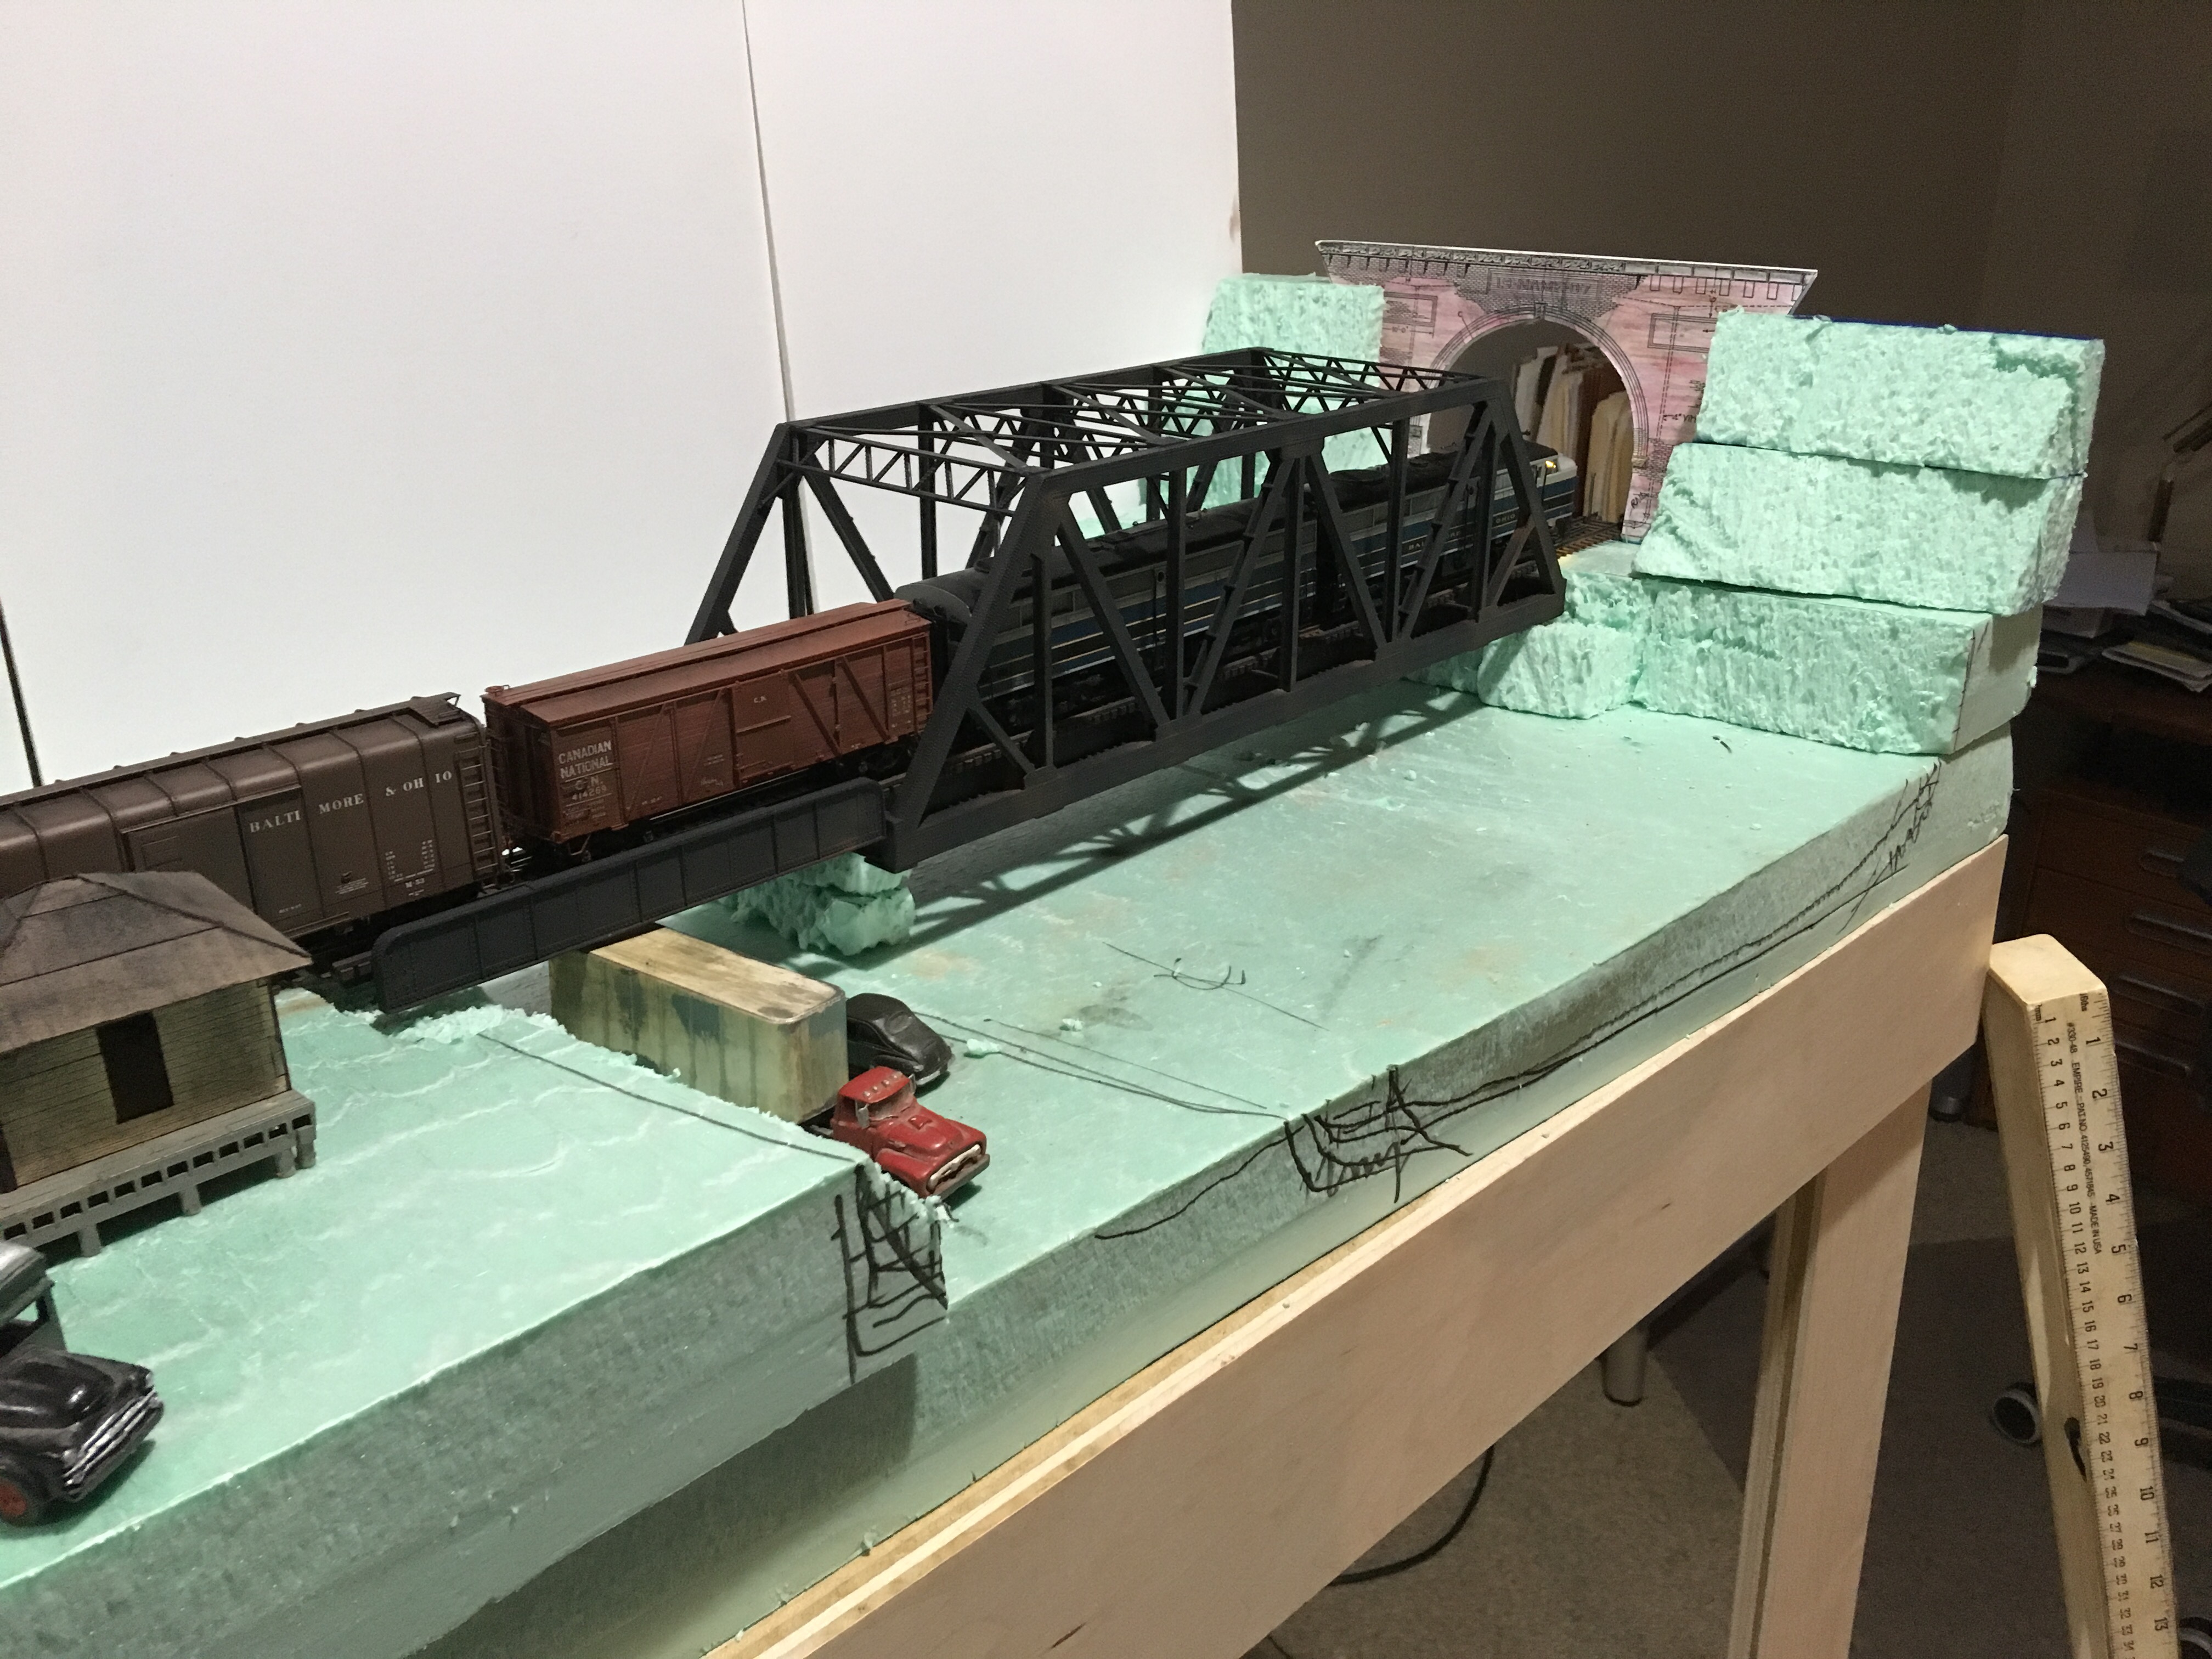
The tunnel portal was originally mocked up using a scaled photocopy of a drawing from the B&O 1908 Standard Plans, as seen above. I was looking for a way to recreate this brick structure when fate intervened. I asked a few OML modeler friends about how they planned to model the distinctive brick tunnel portals and JohnTeichmoeller came through with the suggestion to use the AIM Products #151 Baltimore & Ohio Style Brick Tunnel Portal, Double-Track. http://monroemodels.us/aim.ho.htm A quick email to my friend Raymond Stern at Pro-Custom Hobbies in Eldersburg, MD found one sitting on the shelf waiting for me. Pro-Custom is always well stocked, especially with products for local railroads. http://www.procustomhobbies.com

The portal is cast plaster and readily accepted hobby paint washes of brick red, orange, and brown to create a rich brick color. A steam-era tunnel portal wouldn’t be complete without some exhaust smoke weathering, a little heavier on the uphill side. The prototype now has a distinctive green hue from mosses, but I chose not to model that as I assume the environmental impact of multiple steam engines a day kept the surface free of natural materials.

AIM Products #151 Baltimore & Ohio Style Brick Tunnel Portal, Double-Track
The next step will be to add and paint some “scenery goop” to most of the scene, add trees, ground cover, and the river water. I’ll cover track ballasting in a blog about laying track. And I’ll cover the buildings and final details in another.
As the scene is coming together in my mind I am excited to see it more complete. I like the TOMA concept because of being able to near finish a scene before digging into the next one. The variety of jobs keeps my interest level high and focused, as I tend to wonder to the next shiny object too quickly in my modeling.


Very nice progress, Bruce. A couple years ago I purchased the American Model Builders kit for the “PRR Standard Coal Trestle,” with the idea of using only part of it. Probably overkill. I notice Walthers has recently also come out with a similar product in styrene.
I see the shell of the Lees coaling tower looming in the distance.
B&O Modeler No. 48 has been edited and set up for “layout” since mid December but is waiting for Scott to get back on his feet after some medical setbacks. Al McEvoy has offered to help but Scott seems to think he will be recovering soon. Have plenty of stuff in hand for the next couple of issues.
JT
LikeLike
John,
I am going to finish Ilchester before I start on Lees in earnest. The Coaling Tower is just a foam core mock up for dimensions. I will get you an article on the water Columns this spring. Thanks for all you help over the many years with this section of the layout. Let me know any details I missed.
Best Regards,
Bruce
LikeLike